Category Archives: Vegetarian

Chard cakes with sorrel sauce

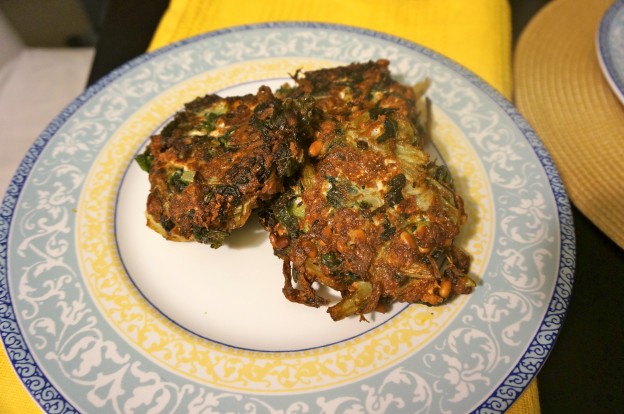
These chard cakes are the perfect vaguely healthy yet super decadent summer appetizer or side dish.  They are seriously so good is difficult to describe. It’s this odd sensation of something super healthy and good for you like chard, and then made a little bit sinful by deep frying it, but then it’s covered in this really fresh and light tasting sorrel sauce.  The recipe for the chard cakes is on p. 149 of Yotam Ottolenghi’s Plenty and is also featured online here.

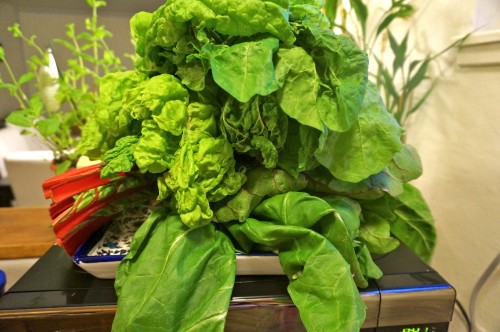
This is how much I love swiss chard

This is how much I love swiss chard

I don’t think I’d ever cooked with swiss chard before starting this blog, but now I’ve cooked at least 4 recipes featuring it. It is just so good the way that Yotam Ottolenghi suggests making it, and it is especially well complemented by Greek yogurt, which I think has been a key ingredient in every swiss chard recipe I’ve made so far (I especially really loved the swiss chard with tahini, yogurt, and buttered pine nuts, featured here).

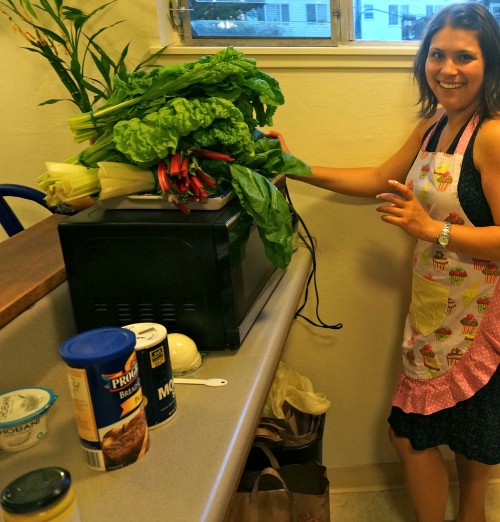
Here I am contending with my mountain of swiss chard

Here I am contending with my mountain of swiss chard

Unfortunately it’s summer and dry as a bone, so I don’t have any mushrooms or a mushroom lesson for you today, but I made this recipe for the first time with my friend Rachel, who is a fellow microbial ecologist and has started a blog herself teaching people about microbes – so check it out if you want to learn some microbial ecology :)

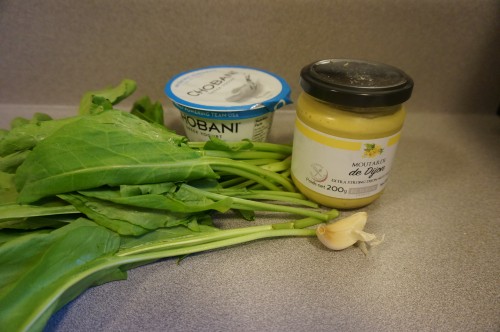
Ingredients for the sorrel sauce - Sorrel, garlic, greek yogurt, dijon mustard

Ingredients for the sorrel sauce – sorrel, garlic, Greek yogurt, dijon mustard

As for the chard cakes, the first step is to make the sorrel sauce, which requires either a food processor or a blender. I used a food blender while making it at Rachel’s house and I used an immersion blender when I made it again at home. Personally I think the immersion blender was a bit easier but either works. Make sure to start boiling the water for blanching the Swiss chard while making the sauce because the sauce doesn’t take that long to make and you might get hungry while waiting for the water to boil!

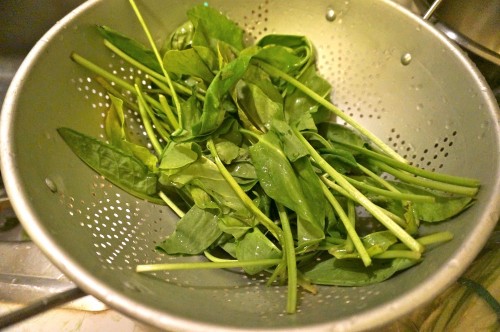
Sorrel leaves

Sorrel leaves

I don’t think I’ve ever cooked with sorrel in my life before! It grows wild all over California and my other friend Rachael, who I took mushroom hunting with me in Point Reyes, was pointing out and collecting the wild sorrel growing along the trails. Next time I will have to collect it myself in the woods, but this time I bought it from the Berkeley bowl.  Blend the sorrel leaves, Greek yogurt, garlic clove, olive oil, and Dijon mustard until smooth.

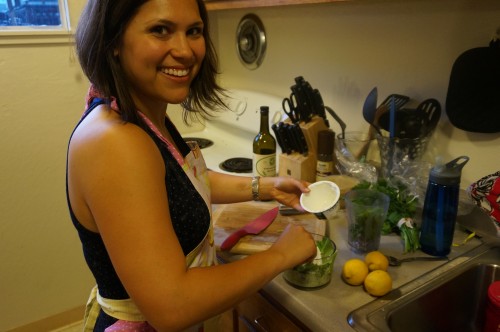
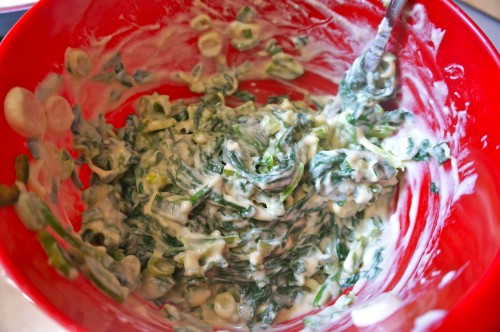
Mixing together ingredients for the sorrel sauce

Mixing together ingredients for the sorrel sauce

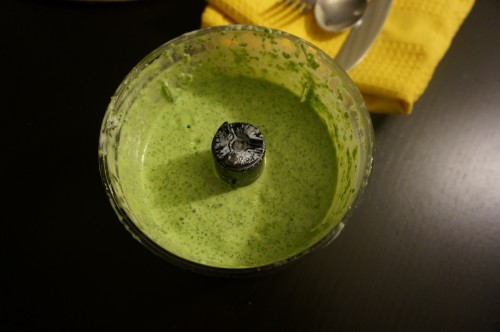
It makes a beautiful bright green sauce that I will have to find other uses for this week since we had a lot of extra! I think it would be good on cous cous or steak and would probably go well with grilled porcinis :)

Sorrel sauce in the immersion blender

Sorrel sauce in the immersion blender

I felt like I would totally fit in with all of the Berkeley and Oakland hipsters when Rachel gave me a mason jar to store the sorrel sauce in:

sorrelsauceinmasonjar

Sorrel sauce

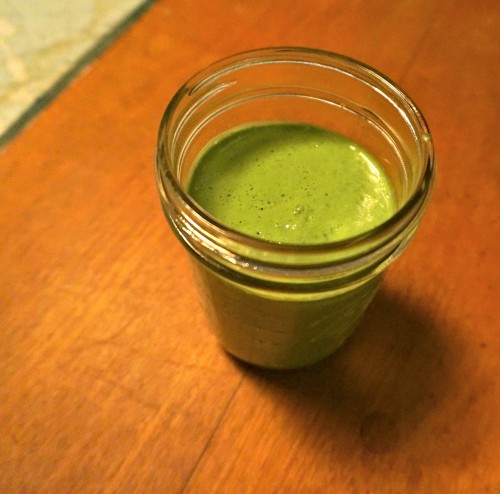
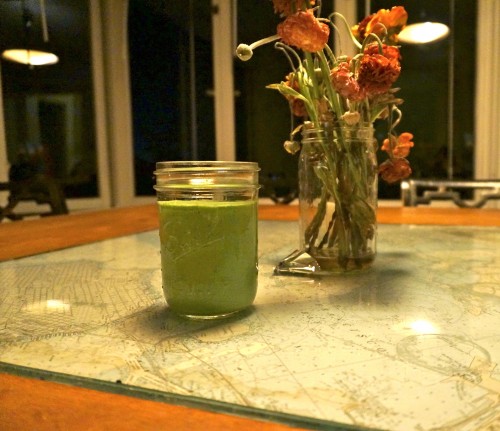
Isn’t it beautifully bright green?

Sorrel sauce in mason jar

Sorrel sauce in mason jar

After the sauce is made the next step is to blanch the swiss chard. While the swiss chard is blanching, sautee pine nuts in oil. This is another repetitive theme in the Ottolenghi books and it is delicious! Pine nuts add such a nice decadent crunch to all of these dishes and they are so good toasted!

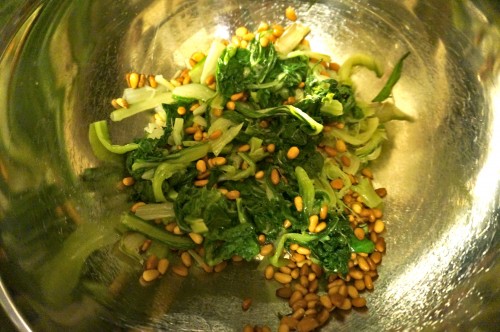
Blanched swiss chard with toasted pine nuts

Blanched swiss chard with toasted pine nuts

Next add the egg, bread crumbs, salt, pepper, and cheese. I had no idea where to find kashkaval cheese but a quick google for substitutions on my iphone while at the grocery store found me mozzarella. Rachel, who has made the recipe before and said she went out of her way to find kashkaval cheese at a specialty cheese shop, said it tasted way better with mozzarella. The mozzarella was creamy and stringy which held together the cakes very well. Then came the fun part – mixing everything together and molding the cakes with my hands! While mixing the cakes we started heating up canola oil in a pan.

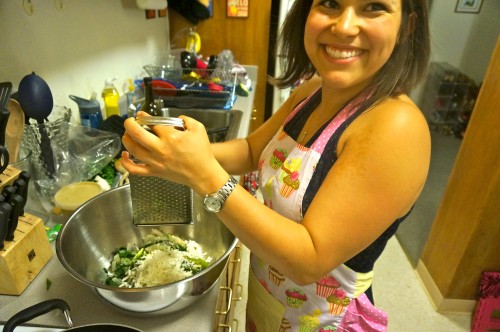
Adding the mozzarella cheese

Adding the mozzarella cheese

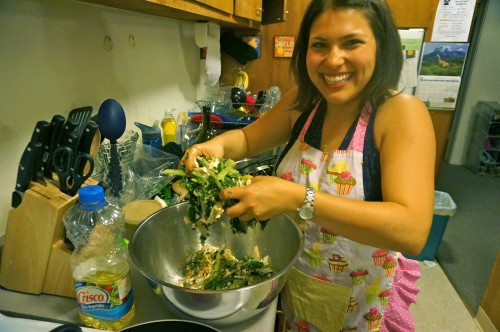
Mixing up the chard cakes

Mixing up the chard cakes

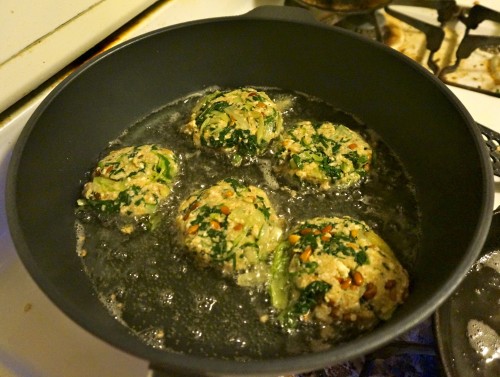
Once the oil was hot we fried the cakes in the oil for 2-3 minutes on each side. This was pretty much my first time frying anything!

swiss chard cakes frying in oil

swiss chard cakes frying in oil

Don’t they look pretty when they start to brown?

Swiss chard cakes browning

Swiss chard cakes browning

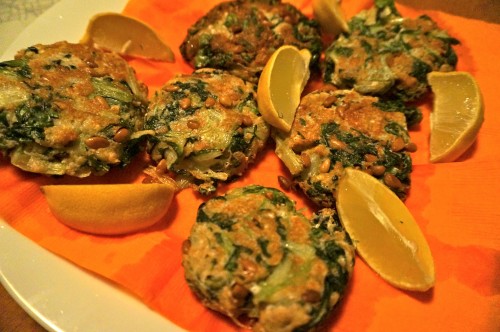
Rachel didn’t have any paper towels but she did have leftover napkins from Halloween which we put to good use!

Chard cakes with lemon wedges and halloween napkins

Chard cakes with lemon wedges and halloween napkins

These cakes tasted super decadent and delicious. They were satisfying and surprisingly not that unhealthy tasting given they were fried in oil.

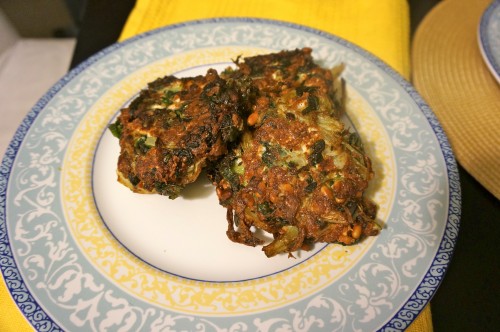
Chard cakes fried to perfection

Chard cakes fried to perfection

You have to make them yourself. Seriously, just go do it. You won’t regret it! Here is the ingredient list to help you out :)

Sorrel sauce:

  • 3 cups sorrel leaves, washed
  • 1/2 cup Greek yogurt
  • 1 garlic clove, crushed
  • 2 tbsp olive oil
  • 1/2 tsp Dijon mustard
  • salt

Cakes:

  • 1.25 lbs Swiss chard
  • 1/3 cup pine nuts
  • 1 tbsp olive oil
  • 4 oz kashkaval cheese, coarsely grated (I used mozzarella)
  • 1 egg
  • 6 tbsp dried white breadcrumbs
  • 1/4 tsp salt
  • black pepper
  • vegetable oil for frying
Brunch time! Green pancakes with lime butter

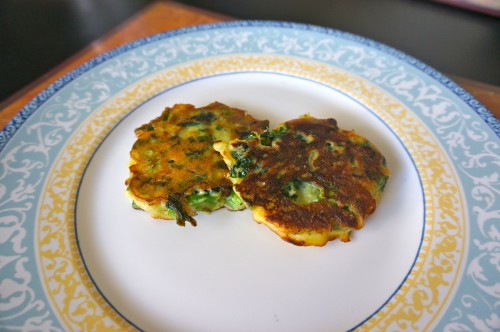
Yesterday I decided to make brunch for my friend Valerie.  Valerie and I met at sleep away camp when we were 10 and have been friends ever since!  One of the first recipes that caught my eye when I bought Plenty, by my main man Yotam Ottolenghi, was the green pancakes with lime butter from page 150.  I am SO glad that I finally made them because they are DELICIOUS. The pancakes are savory and taste like a Chinese egg roll – pancake fusion, or perhaps similar to Jeon, if you are familiar with Korean food.

Green pancakes

Green pancakes in all their savory delicious glory

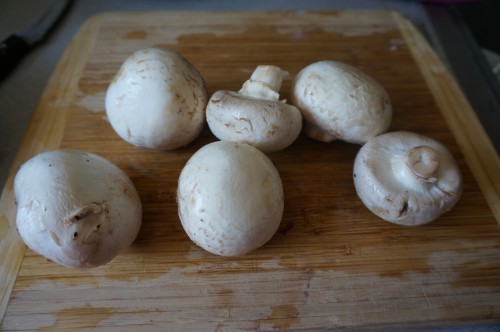
I decided to accompany the pancakes with scrambled eggs with you guessed it, yes MUSHROOMS. My blog has been sadly bereft of mushrooms as of late, so I decided to add them in to my scrambled eggs. Even though they were just regular button mushrooms from the Berkeley bowl, any mushroom is better than no mushroom in my opinion, and I’ve always thought the button mushrooms get a bad rap. Did you know that Agaricus bisporus, the common grocery store button mushroom, is actually the same species as cremini and portabella? Yes, you thought you were being fancy buying portabella mushrooms, but in fact it’s just a button mushroom grown larger. I’m not saying they aren’t still good though..look how pretty these babies are:

mushrooms!

mushrooms!

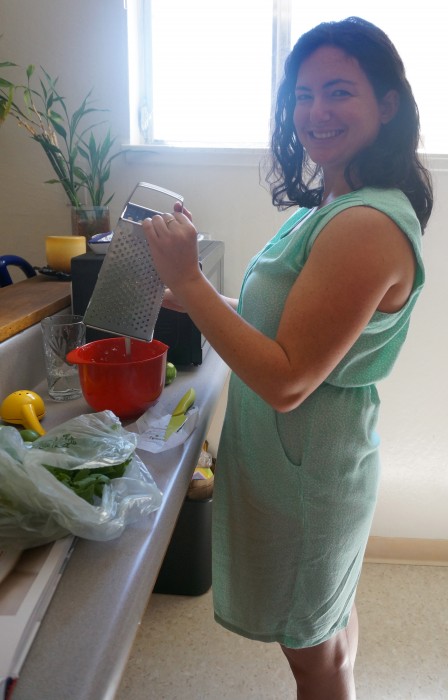
I sauteed some mushrooms with half a red onion for the eggs while Valerie got started on the lime butter, which is a magic combination of butter, lime juice, lime zest, salt, pepper, cilantro, garlic, and chile flakes. Here is Valerie making the lime butter:

Valerie making the lime butter with lime zest, lime juice, salt, pepper, cilantro, garlic, and chile flakes

Valerie making the lime butter with lime zest, lime juice, salt, pepper, cilantro, garlic, and chile flakes

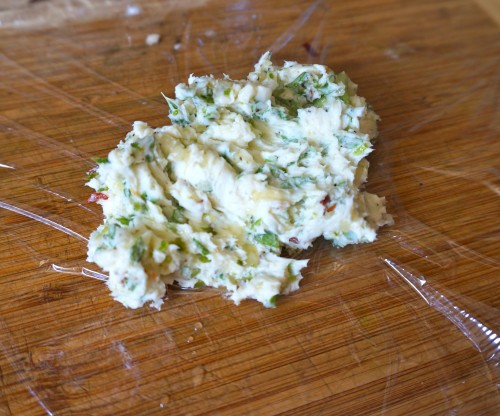
Here is the completed lime butter before we rolled it up in saran wrap and stuck it in the fridge to chill:

lime butter with lime juice, lime zest, salt, pepper, cilantro, garlic, chile flakes about to be chilled

lime butter with lime juice, lime zest, salt, pepper, cilantro, garlic, chile flakes about to be chilled

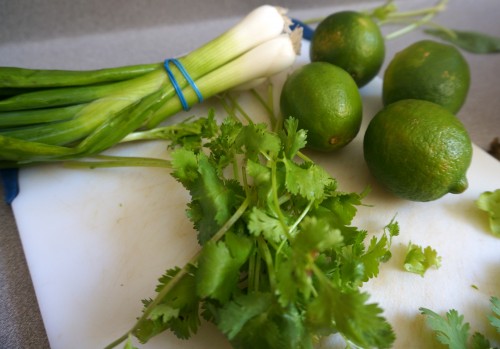
How beautiful are all of these green ingredients for the green pancakes?

Green onions, cilantro, and limes for the green pancakes with lime butter

Green onions, cilantro, and limes for the green pancakes with lime butter

The next thing to do is to wash and wilt 0.5 lb of spinach in a pan, drain it, let it cool, squeeze out the moisture, roughly chop it, then set it aside. For the pancakes, Ottolenghi calls for self-rising flour, which you make by adding 1.25 tsp baking powder and a pinch of salt to 1 cup of regular all-purpose flour.  Melt 4 tbsp of butter in a pan and then add it to 3/4 cup self rising flour, 1 tbsp baking powder, 1 egg, 0.5 tsp salt, 1 tsp cumin, and 2/3 cup milk in a large mixing bowl and whisk until smooth.  Finely slice the green onions, then add them and the wilted spinach to the pancake mixture along with a green chile. Ottolenghi called for 2 fresh green chiles but he did not specify which kind and since I’m not huge on spicy I used one large jalapeno pepper. I removed the seeds from the jalapeno pepper before adding it to the pancakes but if you are a big fan of spicy, by all means go ahead and add more! Here is what the pancake mixture looks like:

Pancake mixture with flour, baking powder, egg, butter, salt, cumin, milk, green onions, spinach, and green chile

Pancake mixture with flour, baking powder, egg, butter, salt, cumin, milk, green onions, spinach, and green chile

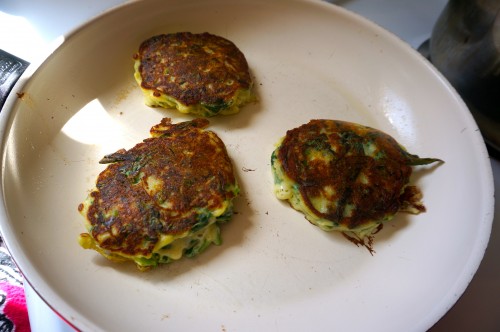
The next step is a bit complicated – you are supposed to whisk an egg white to soft peaks and gently fold it into the batter. What exactly is a soft peak?? I had no idea about this but luckily Valerie seemed to know, but unfortunately she said my whisk stinks and she could not whisk to soft peaks with it.  Luckily the pancakes still turned out gorgeous even with the poorly whisked egg whites:

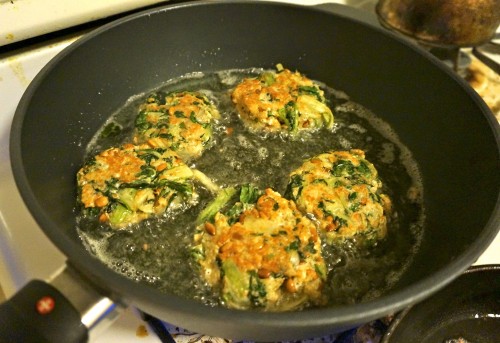
Green pancakes browning in the pan

Green pancakes browning in the pan

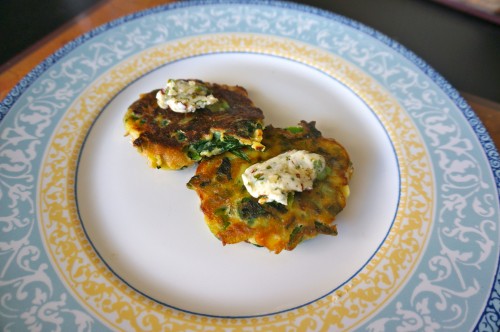
Heat a pan to medium high heat, add olive oil, and add 2 tbsp of pancake batter for each pancake and cook them for 2 minutes on each side. Here are the pancakes with lime butter:

Green pancakes with lime butter

Green pancakes with lime butter

For the scrambled eggs, I cracked and whisked up 5 eggs, added salt, pepper, and basil flakes, and added them to the sauteed mushrooms and onion:

Green pancakes with lime butter with scrambled eggs with mushrooms and onions

Green pancakes with lime butter with scrambled eggs with mushrooms and onions

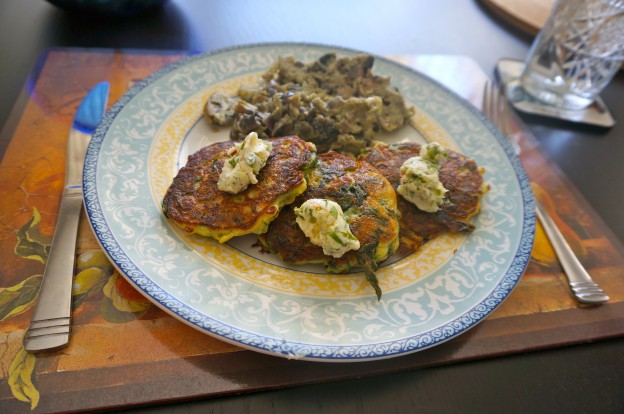
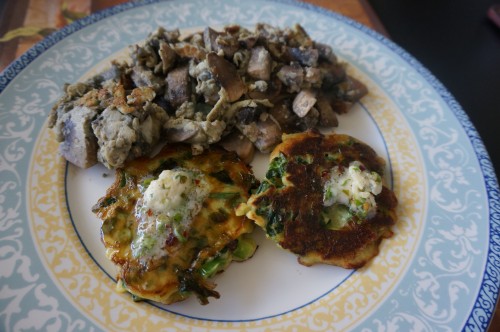
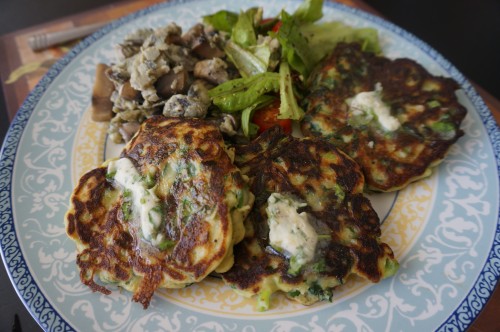
Valerie brought over some fresh lettuce from her mother’s garden and we made a simple lettuce and tomato salad to accompany the pancakes and scrambled eggs. Here is the completed meal:

DSC02021

Green pancakes with lime butter, scrambled eggs with mushrooms and onions, and lettuce and tomato salad

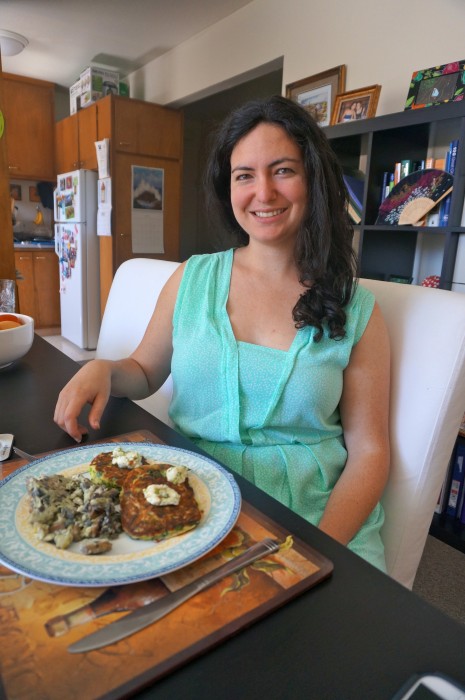
Here is Valerie enjoying the lovely meal:

Valerie and her delicious brunch of green pancakes with lime butter and scrambled eggs with mushrooms

Valerie and her delicious brunch of green pancakes with lime butter and scrambled eggs with mushrooms

Next time you are thinking of going out to one of those trendy brunch spots and waiting over an hour in line to be at the hippest spot in town, think about making this brunch at home instead. Delicious high quality and way cheaper brunch fair all from the comfort of your own home – plus you get to keep the leftovers. I highly recommend it :)


Ingredients:

Lime butter
8 tbsp (1 stick) unsalted butter, at room temperature
Grated zest of 1 lime
1 1/2 tbsp lime juice
1/4 tsp salt
1/2 tsp white pepper
1 tbsp chopped cilantro
1/2 garlic clove, finely chopped
1/4 tsp chile flakes

1/2 lb (about 8 cups) spinach, washed
3/4 cup self-rising flour
1 tbsp baking powder
1 egg
4 tbsp unsalted butter, melted
1/2 tsp salt
1 tsp ground cumin
2/3 cup milk
6 medium green onions, finely sliced
2 fresh green chiles, thinly sliced
1 egg white
Olive oil for frying
Barbecued maitake and mee goreng

Maitake frondosa, known to some as ‘hen of the woods’ is a saprotropic fungus that makes a living by eating decaying wood.   While that may not sound incredibly appetizing, this ecology makes them fairly easy to cultivate and to produce reliably for consumption. This is lucky for me since they are not native to California and I can’t easily forage for them!  Since they are not native California mushrooms, I had never cooked these beautiful and intriguing mushrooms before, and I did not quite know what to do with them. Luckily, Justin Reyes from Gourmet Mushrooms, Inc suggested a delicious marinade inspired by this youtube video from chef Louisa Safia of LucidFood, which turned out to be quite the crowd pleaser. It was so popular in fact, that my friends Meera and Judy asked me for the recipe immediately after the dinner, and Meera went home and tried it out the next day!

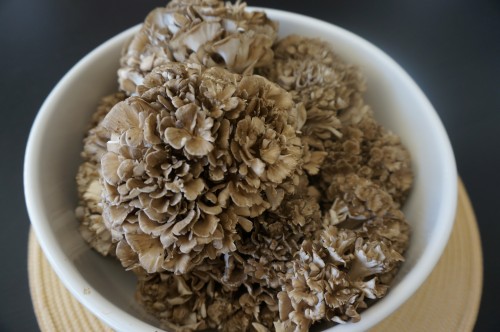
Maitake Frondosa

Maitake Frondosa or ‘hen of the woods’

The first step is to make the marinade the night before you want to cook the mushrooms and let them soak it up overnight in the fridge.  Unfortunately, I only realized this last minute and found myself mixing up the marinade at midnight the evening before I cooked these mushrooms, but hopefully you can be smarter and plan ahead – trust me, this marinade is worth it!

Marinated maitake

Marinated maitake

Here are the ingredients for the marinade:

  • 1 cup olive oil
  • 1/2 cup soy sauce
  • 2 scallions, green and white parts
  • 3 cloves garlic, crushed and peeled
  • 2 Tbsp honey
  • 2 Tbsp white wine
  • Salt and fresh ground pepper
  • 3 lbs Maitake Frondosa

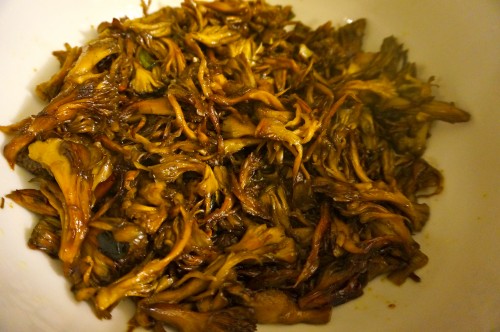
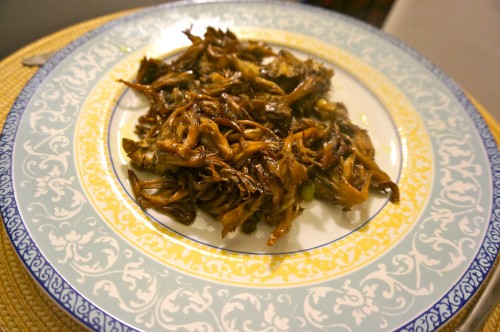
Blend the olive oil, whole pieces of scallion whites, whole garlic cloves, honey, 2 Tbsp wine, salt and fresh ground black pepper in blender. My handy dandy immersion blender worked great for this :) Then you either need to find a giant zip lock bag or a bowl and pour the sauce over the mushrooms and let them soak it up in the fridge over night. Save half a cup of the marinade for the reduction sauce the next day. While this recipe suggest barbecuing the mushrooms or using a cast iron skillet, I unfortunately had neither so I just used a big pan to saute them up. Don’t worry -they still tasted great! Just make sure to leave them alone and let them cook for a really long time until they start to get brown and crispy. While they are cooking, you can make the reduction sauce by adding 3 Tbsp of white wine to the reserved 1/2 cup of marinade and reducing it to a simmer after you’ve brought it to a boil. When the mushrooms are nice and crispy you can spread the reduction sauce on them and it tastes so good!

Barbecued maitake

Barbequed maitake

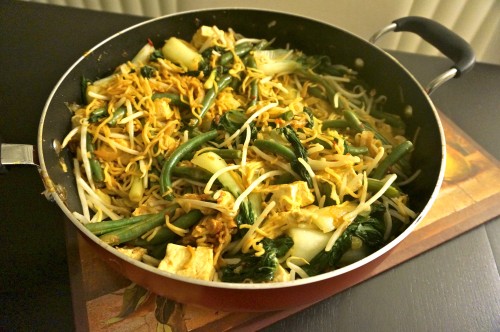
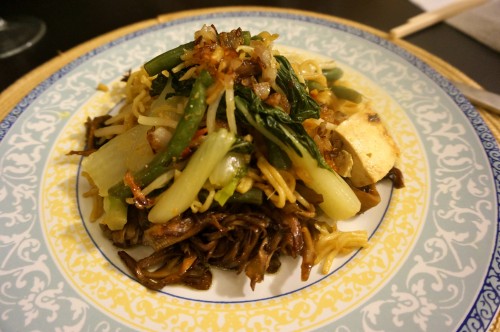
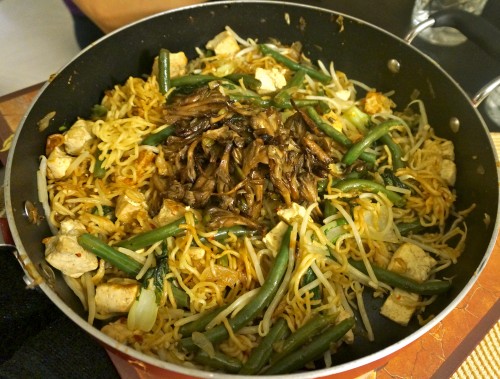
I decided that this meaty mushroom  would make a great accompaniment to the vegetarian mee goreng from Plenty, which I featured in this post.  Mee goreng is a Malaysian street food that is super healthy and super simple, and takes only a few minutes to stir fry up after all the vegetables have been chopped and prepared.

Mee goreng

Mee goreng

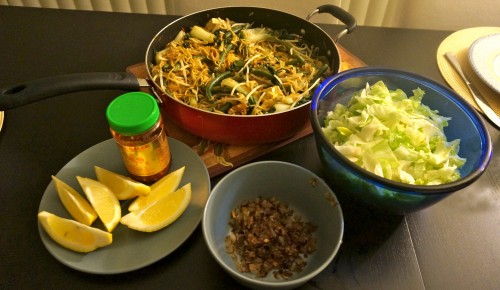
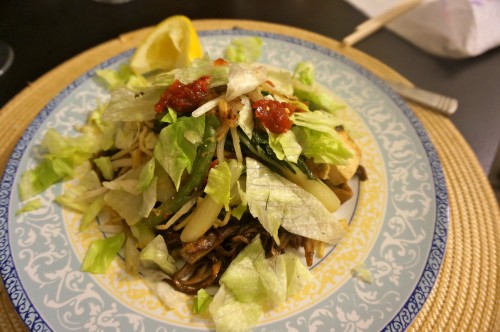
Ottolenghi suggests serving the mee goreng with shredded lettuce, fried shallots, lemon wedges, and a Malaysian spicy chili sauce called sambal oelek. Fortunately I was able to find sambal oelek  at Berkeley bowl, but it looks like it is super easy to buy online!

Mee goreng with lettuce, lemon wedges, sambal oelek, and fried shallots

Mee goreng with lettuce, lemon wedges, Sambal oelek, and fried shallots

Here is my plate all loaded up with mee goreng:

DSC00866

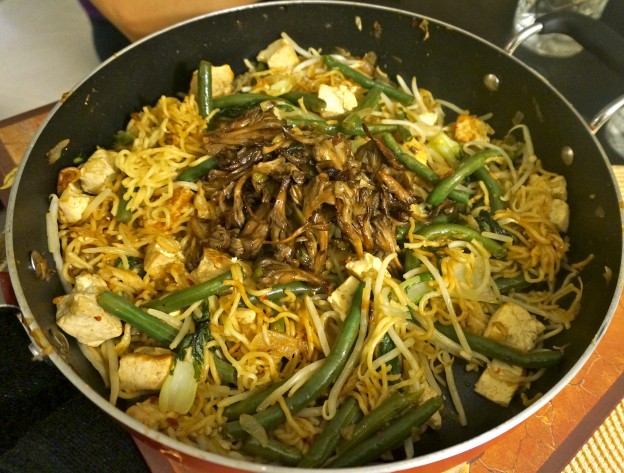
Here is the mee goreng served as suggested with the shredded lettuce, lemon wedges, fried shallots, and sambal oelek on top:

DSC00871

It went really well with the maitake mushrooms and my friends Judy and Meera gratefully gobbled it up. They were both super fun to cook for and claimed that these dishes induced euphoria and it was hands down one of the best meals they’d eaten that year.  This meal was probably the easiest and simplest of my three Gourmet Mushrooms Inc. feasts. It was also probably the most delectable! Don’t you just love when that happens?

Mee goreng with bbqed maitake

Mee goreng with BBQed maitake

Cheesy mushroom lasagna

I’ve never made a lasagna before but this seemed like a good use for the Italian Velvet pioppini mushrooms, and I thought the Trumpet royales would be a nice meaty addition. I found this recipe in Yotam Ottolenghi’s Plenty, and he claims that it’s the very best cheesy lasagna, and who am I to argue with Ottolenghi? This is definitely not a dish to make if you are watching your waistline, since it involves LOTS of butter and LOTS of different kinds of cheeses.  I usually prefer to cook the lighter middle eastern themed dishes, but I figured I should include at least one rich, decadent, creamy recipe with my mushrooms! Besides, this is a great dish to feed a crowd, which was great, since I invited 5 lovely ladies to enjoy the meal with me.

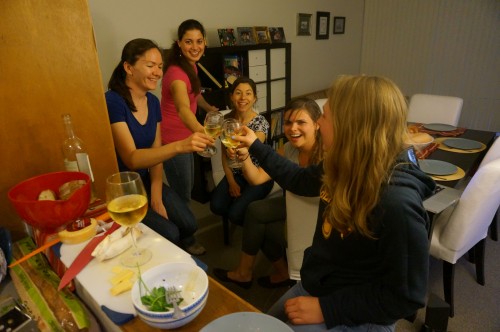
Stella, Meera, Lauren, Simone, and Claire  toasting to ladies and mushrooms!

Toasting to ladies and mushrooms!

This dish is also pretty involved and requires lots of different components and long cooking times, so we enjoyed some wine and crostinis with butter and sauteed mushrooms while the food cooked.  Ottolenghi suggests using porcinis and assorted mixed mushrooms for this dish, but the Velvet pioppini and  Trumpet royale mushrooms worked great! First I preheated the oven to 350 F, then I cut and sauteed the Trumpet royale mushrooms in butter:

Trumpet royale mushrooms

Trumpet royale mushrooms

I used some of these for the appetizer crostinis, and the rest I saved for the lasagna.  Next I cut and sauteed the pioppini mushrooms in butter and added a few springs of thyme.

pioppiniandkingtrumpetscooking


Once the mushrooms were cooked, I added 2 tbsp chopped tarragon and 4 tbsp chopped parsley, and set it aside for later. Don’t the mushrooms look tasty with all of the bright green herbs?

Sauteed mushrooms in butter, with thyme, parsley, and tarragon.

Sauteed mushrooms in butter, with thyme, parsley, and tarragon.

Next I made the bechamel, which of course I had never made before.  It involves – you guessed it – lots of butter! After melting 5 tbsp of butter and adding a chopped shallot, which I cooked for a minute, then I had to add 0.5 cup flour and stir continuously for 2 minutes. This is the part where things got a bit tricky and I’m not quite sure I did everything right. You are supposed to add 2.5 cups of milk, 0.5 tsp salt, whisk until boiling, then simmer for 10 minutes. This seemed to reduce a lot and didn’t make nearly as much bechamel as I thought I was supposed to have for this lasagna. Granted, we were supposed to add 6oz of Gruyere to the bechamel, which I did not do because one of my friends accidentally brought smoked Gouda instead of Gruyere and I thought the smoked Gouda would overwhelm the dish so I just left it out.  Perhaps that would have made a large difference in volume and I would have had a lot more ooey gooey lasagna. So this lasagna only had 4 types of cheese instead of 5! Oh well :) The bechamel is supposed to coat the bottom of the lasagna pan, and is supposed to top every layer of the lasagna, but we definitely did not have enough to top every layer. Here I am chopping the butter for the bechamel:

Cutting up butter for the bechamel

Cutting up butter for the bechamel

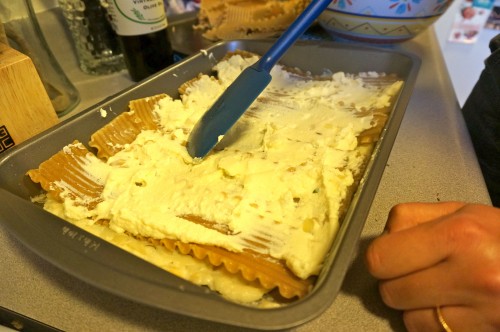
For the next layer of the lasagna, I mixed 13 oz of ricotta with an egg, 3 tbsp of the bechamel sauce, and 5 oz of feta.  For the noodles I substituted whole wheat lasagna for spinach lasagna, which I could not find anywhere. My friend Stella graciously boiled each lasagna noodle for a few minutes before I layered them into the lasagna. There seems to be a lot of room for flexibility when it comes to layering a lasagna. Clearly it depends on the size of the pan you use and the size of the noodles, so my lasagna only ended up having 3 layers of noodles and one layer of bechamel sauce to coat the bottom. After coating the bottom with the bechamel, then adding a layer of lasagna noodles, I then spread the ricotta/feta/egg mixture on top.

Spreading the ricotta/feta/egg mixture on top of the lasagna noodles

Spreading the ricotta/feta/egg mixture on top of the lasagna noodles

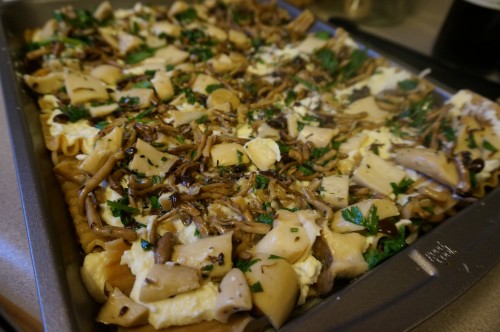
Next, I added the mushroom and herb mixture.

Mushrooms sauteed in butter and herbs layered into the lasagna

Mushrooms sauteed in butter and herbs layered into the lasagna

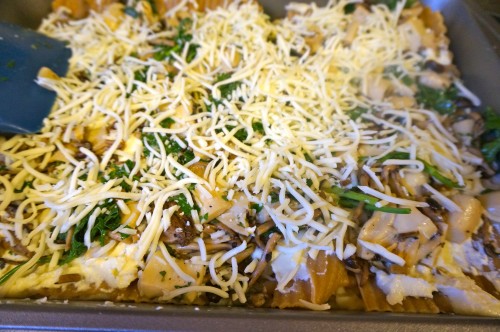
On top of the mushrooms we added shredded Mozarella:

Lasagna noodles layered with ricotta/egg/feta mixture, mushrooms and herbs, and shredded mozzarella

Lasagna noodles layered with ricotta/egg/feta mixture, mushrooms and herbs, and shredded mozzarella

shreddedcheeseandmushrooms2


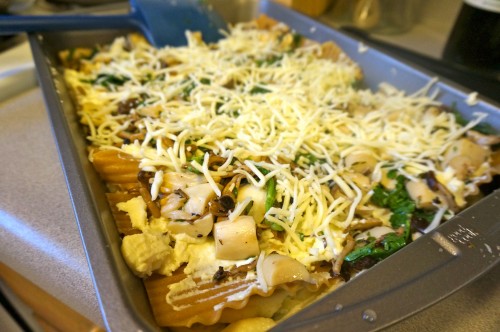
I made two such layers, then added another layer of noodles and topped with more mozzarella and some parmesan (told you this recipe involved lots of cheese!).  Then I covered the lasagna in foil, and baked it for 40 minutes at 350 F (thankfully I had preheated the oven!). After 40 minutes you are supposed to remove the foil and leave in for another 10 minutes. At this point the parmesan came out nice and golden:

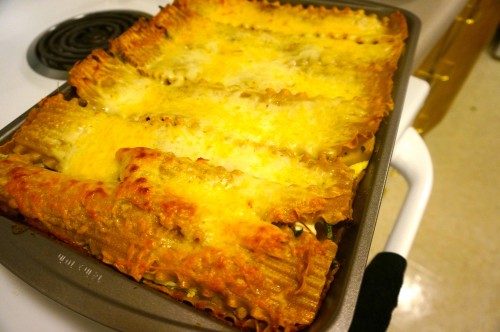
Mushroom lasagna topped with shredded mozzarella and parmesan

Mushroom lasagna topped with shredded mozzarella and parmesan

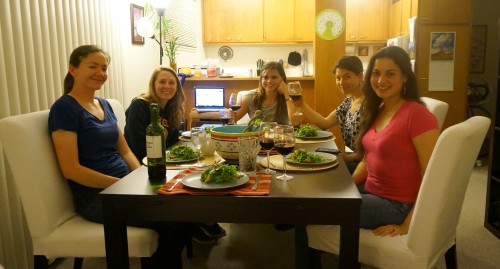
After 40 minutes my friends were a bit antsy, and it was not very easy getting them to wait the required 10 minute resting period after the lasagna came out of the oven.  I fed them arugula and tomato salad while they waited for the lasagna, which was a nice pairing (thanks to Ottolenghi for the tip!). Here’s all my friends eating the salad while they eagerly awaited the lasagna:

ladiesatable

Stella, Claire, Simone, Lauren, and Meera waiting for the lasagna to come out!

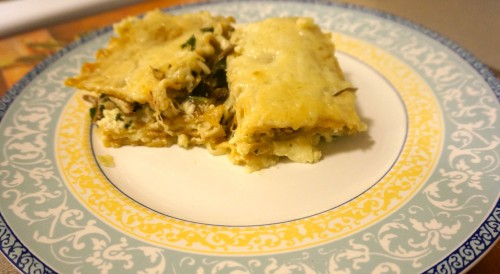
Needless to say, they were very excited once I finally let them cut into it:

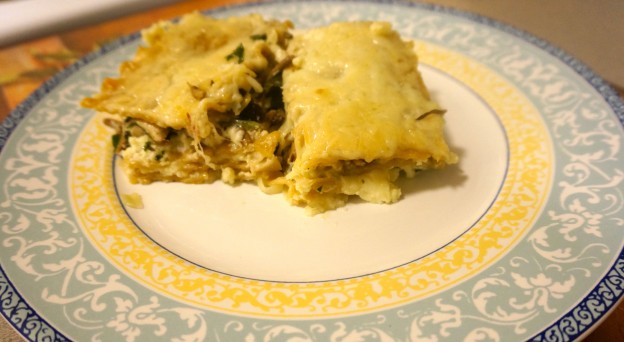
Mushroom and cheese lasagna

Mushroom and cheese lasagna

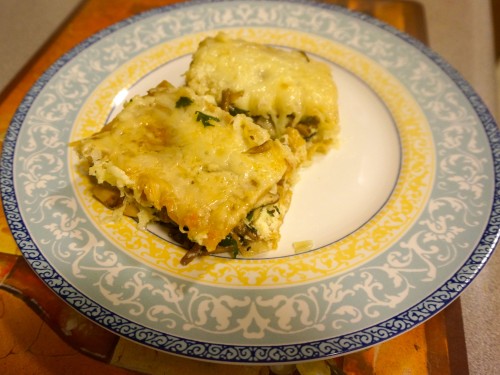
The lasagna was very cheesy and rich:

lasagnaonprettyplate2lasagnaonprettyplate4
Overall, it was a very fun night filled with decadent cheesy mushroom lasagna, wine, and good friends. Here’s to mushrooms and girlfriends – two things I could definitely never do without!

Porcini and leek frittata with mozzarella cheese

I went rock climbing for the second time ever last week and I swear I thought my arms were going to fall off as I started cutting into the porcini. I was soo thankful that I had cleaned and cut the leeks the day before.  Leeks are super dirty so you have to be really careful and clean them really well. I ended up plugging my sink and filling it with water and slicing up the leeks and letting them soak in the sink overnight on Sunday night. Then when I woke up Monday morning I drained the sink, put the leeks in a colander and rinsed them off again before sticking them in a tupperware in the fridge so they would be ready later in the week. As I said, my arms hurt so badly from rock climbing so I was really thankful for the foresight!

I was starving after rock climbing for nearly 3 hours and couldn’t wait to get the porcinis in the pan although my arms were stinging while I held the knife. So my cutting of the porcinis was not as precise and beautiful as in the previous post, but unfortunately you will not be able to see the photo-documentation of this as I accidentally left the memory card outside of my camera while I was preparing this meal so all of the pictures that I thought I had taken do not exist! Drat! At least I got a beautiful picture of the finished product :)

Something to keep in mind is that the Boletus barrowsii turns a bit purple after cutting it and it seems a bit alarming when cooking them and they start to turn purple, but I ate them on Sunday night and I’m still alive :)  To speed things up I heated up two pans with olive oil, filled one with leeks and the other with porcinis, and left them to saute for a long time while I worked on writing this. You really want to just leave them alone for a while so they cook enough and get nice and browned. Once the leeks were well cooked, I decided to toss in some fresh thyme that I had sitting in my fridge leftover from one of my recipes from last week. Then I cracked 8 eggs, added salt, pepper, and oregano, and then whisked it really well before pouring the eggs over the leeks. Next, I added the browned porcinis and let it set up in the pan a bit. At that point I realized that I had completely forgotten to preheat the oven so I turned it on and let the eggs sit on the counter while it heated up – it’s just a simple frittata so I figured it should be fine! I also remembered that I had 8 oz of fresh mozzarella in my fridge and I only needed 4 oz for my next recipe so I went ahead and chopped that up and added it to the frittata for good measure. My friend and former California Mushrooms student Claire (featured in this post) came over to enjoy the frittata with me and she loved it!  This turned out to be a super simple and filling meal that worked great as leftovers throughout the week. It also tasted really delicious when accompanied by the sorrel sauce that will be featured in the next post!

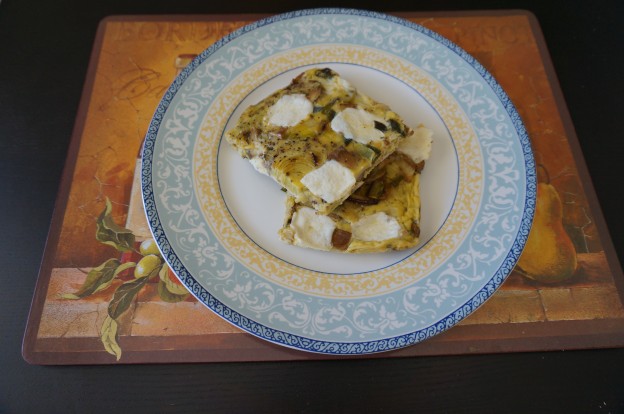
Porcini and leek frittata

Porcini and leek frittata

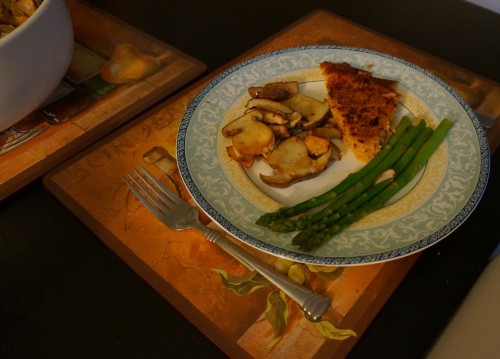
Roasted butternut squash & red onion with tahini & za’atar with couscous and tomato and onion, asparagus, and sauteed porcinis

I know that you have all been waiting with baited breath to see what I’ve done with my porcini haul.  I’ve made a porcini and leek frittata which I will feature in a later post, and today I’m going to tell you about one of the best meals I’ve ever cooked in my life. It was so incredibly amazing that all I wanted to do this week was stay home from work and cook all day and eat my food. This was my second time cooking this butternut squash dish – the first time I made it was that fateful night before Christmas where I discovered Jerusalem at my friend Meera’s house.  This dish is freaking delicious. It is not that complicated but it is so insanely flavorful and fulfilling that I think you have to go home and cook it like right now! The hardest part of cooking this dish is cutting up the butternut squash, which admittedly, requires guns.  This recipe can be found on pg. 36 of Jerusalem and is featured online here and on another Ottolenghi admirer’s blog here. Before embarking on the arduous task of cubing the squash, remember to preheat your oven to 475 degrees F.

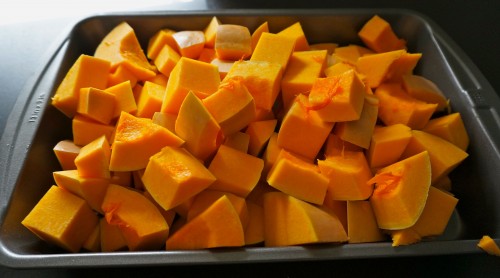
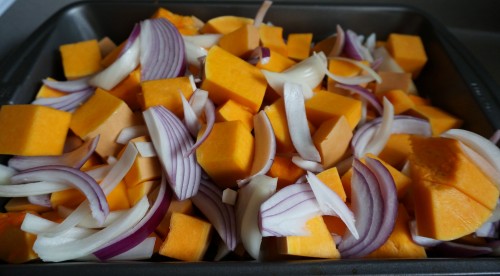
Cubed butternut squash

Cubed butternut squash

After cubing the squash, you can congratulate yourself, because the hardest part is now over! Next roughly slice 2 red onions and add them to the squash, then add 3.5 tbsp of olive oil and some salt and pepper before sticking it in the oven for 40 minutes.

Butternut squash with red onions

Butternut squash with red onions

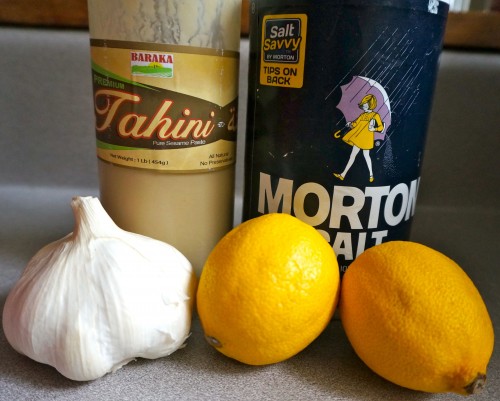
While it’s in the oven you can make the tahini sauce, which is super simple. Whisk together 3.5 tbsp light tahini paste, 2 tbsp water, 1 small crushed garlic clove, and 1/4 tsp salt.

Ingredients for tahini sauce

Ingredients for tahini sauce

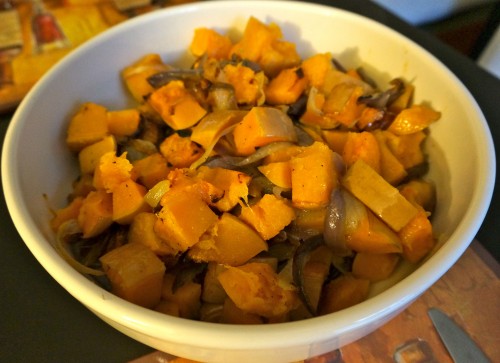
You can also saute the pine nuts in 1.5 tsp olive oil with 0.5 tsp salt for 2 minutes.  Once they are golden brown, remove them from heat and transfer them to a small bowl while you wait for the squash. After 40 minutes, the squash and onions should be nice and soft.

Roasted butternut squash and red onions with olive oil, salt, and pepper

Roasted butternut squash and red onions with olive oil, salt, and pepper

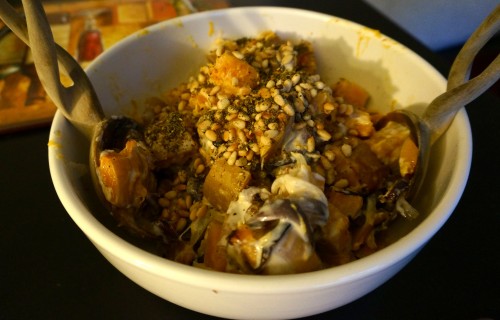
Once it’s cooled down a bit, toss the squash and onions with the tahini sauce, add in the pine nuts with their oil, and top with 1 tbsp za’atar. This dish is just so so good. I really cannot emphasize enough how much I love this dish!

Roasted butternut squash & red onions with tahini & za'atar

Roasted butternut squash & red onions with tahini & za’atar

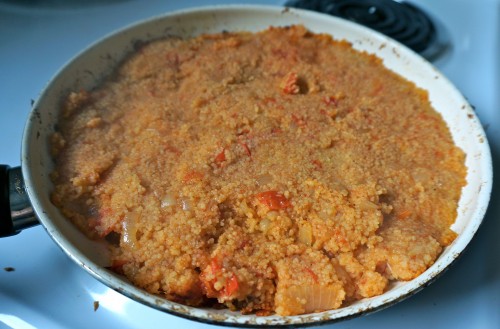
I decided to try my hand again at the couscous with tomato and onion that I made the other night with my friend Dan and featured here.

Couscous with tomatoes and onion in pan

Couscous with tomatoes and onion in pan

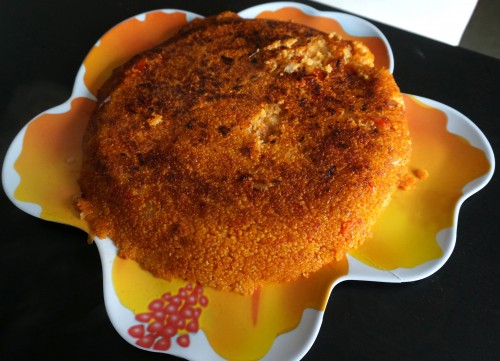
It accompanied the butternut squash & red onions with tahini dish really well and I have to say I was really pleased with myself that I managed to get the crust right this time :) I got a really crispy crust on the edge (I just had to let it sit in the pan a bit longer) and I managed to flip it over onto the plate completely in tact! I didn’t spill any couscous on the floor this time! The only plate that I had that was large enough for this task was a orange flower platter that I had from the 99 cents store when I first started grad school. Perhaps not my classiest dish, but it was big enough that I got the couscous flipped onto it without dropping any, so it definitely did the job.  I am very proud of this dish :) Definitely proof that practice makes perfect!

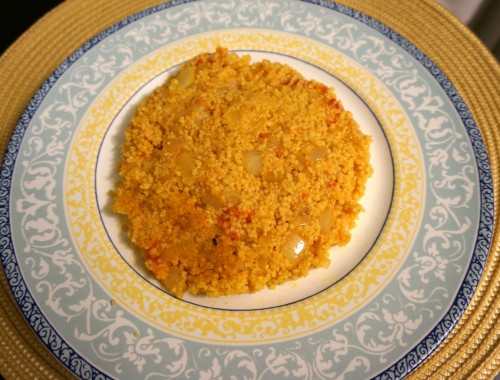
Couscous with tomato and onion

Couscous with tomato and onion

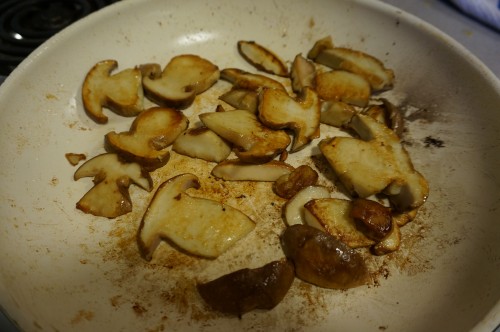
I know what you are thinking – where are the mushrooms? Don’t worry – I definitely made them! They were so meaty and delicious and added so much depth to the experience of this meal.  Asparagus is in season now and was on sale at the Berkeley bowl so I added that to my pan with with the mushrooms.

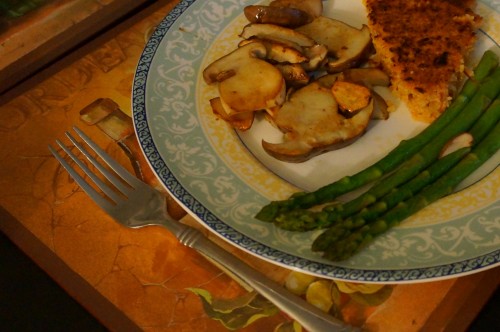
Sauteed porcinis

Sauteed porcinis

Here’s my crispy couscous  with the asparagus and porcinis.

Sauteed porcinis and asparagus with crispy couscous

Sauteed porcinis and asparagus with crispy couscous

How beautiful do those porcinis look? This is how you want them – nice and browned.

Porcinis with asparagus and couscous

Porcinis with asparagus and couscous

Ok, let’s get a close up of my star ingredient.

Sautteed porcinis

Sautteed porcinis

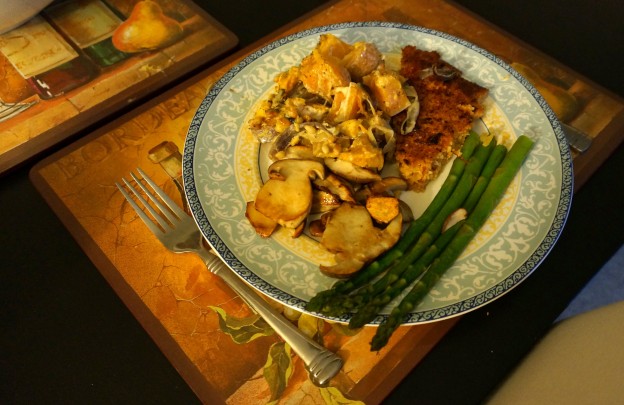
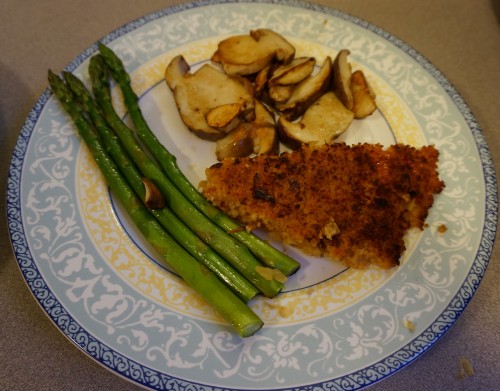
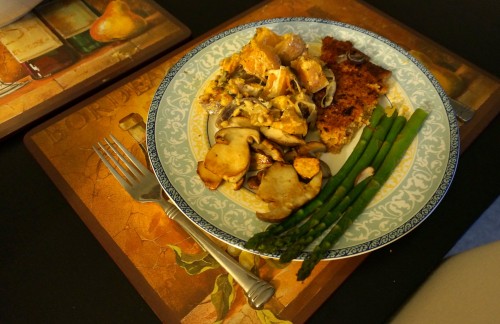
And here is the completed meal! My friend Simone, who is another biology graduate student and a talented artist as well who makes really cool biological themed mythical paintings, came over to enjoy the meal with me. Maybe I can convince Simone to make some beautiful mushroom themed paintings for me!

Roasted butternut squash & red onions with tahini & za'atar with couscous, tomato and onion, and sauteed porcinis and asparagus

Roasted butternut squash & red onions with tahini & za’atar with couscous, tomato and onion, and sauteed porcinis and asparagus


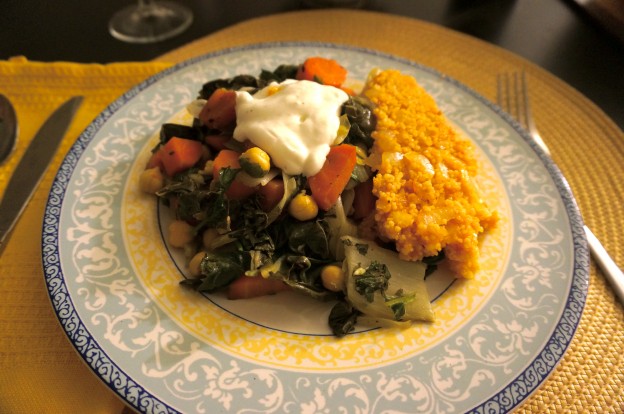
Chickpea saute with Greek yogurt and couscous with tomato and onion

Ok, so yes, I know you are thinking – why is this girl calling herself fungi foodie when all she cooks is middle eastern food? Well guess what everybody – it’s been raining! A lot! In Berkeley! So I’m going to go mushroom hunting this weekend :) So with any luck I will have a delicious wild mushroom recipe for next week! Yay for wild mushrooms :)

But in the meanwhile, I’m continuing on my theme of cooking healthy, delicious vegetarian recipes from Jerusalem and Plenty. This week, I cooked the chickpea saute with Greek yogurt from pg. 211 Plenty and featured online here and the couscous with tomato and onion from pg 129 of Jerusalem and featured online here.

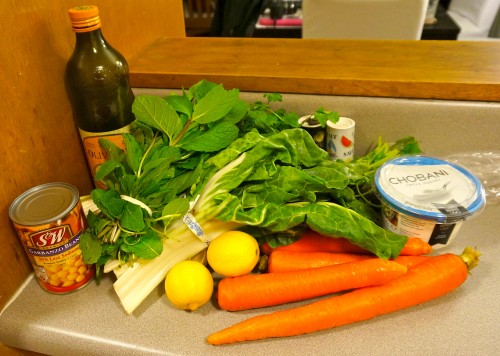
These dishes were on the less complicated side for Yotam Ottolenghi and my trip to Berkeley Bowl for groceries was one of the easiest and shortest trips yet! Either I’m getting much better at this whole grocery shopping thing or I am indeed choosing simpler recipes :P Here are all of the lovely fresh ingredients for the chickpea saute – look at all those fresh herbs and veggies! I really need to consider getting some potted herbs!

Ingredients for the chick pea saute

Ingredients for the chick pea saute

The first step is to separate the green part from the stalks of the chards – I’m totally falling for this stuff! It’s so pretty!

Swiss chard centers

Swiss chard centers

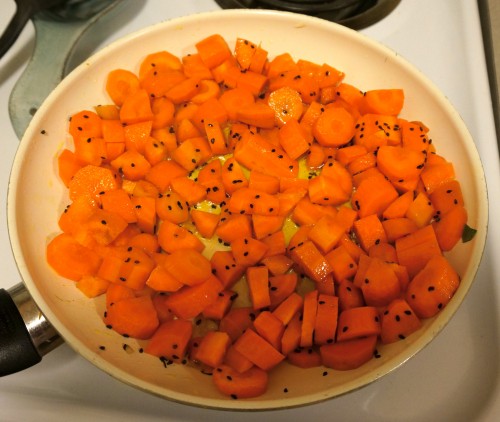
So you blanch the chard stalks for 3 minutes in boiling water, then add the greens and blanch them for 2 more minutes, then remove from boiling water, rinse in cold water, and drain.  Then you heat up 1/3 cup olive oil in a pan – Dan was appalled at this amount of oil – but I reminded him that olive oil is good for you :) He remained unconvinced but I decided to stick to Ottolenghi’s guidelines despite Dan’s rumblings. So you peel and chop up the carrots and saute them in the olive oil, then add caraway seeds. I’d never used caraway seeds before cooking from these books but they are such a good spice! I bought them super cheap from the bulk spice section at Berkeley Bowl and I’m totally hooked.

carrots sauteeing in olive oil with caraway seeds

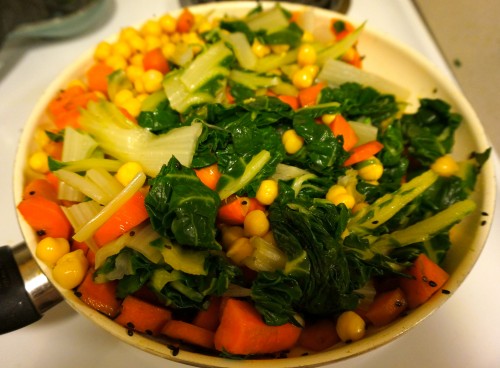
So after the carrots are cooked, add the blanched chard back in, add in the chick peas (yes I used canned – perhaps a faux pas but after the disaster of trying to cook fava beans from scratch, I’m sticking to canned. It’s just so much easier!), add in garlic and fresh mint and parsley.
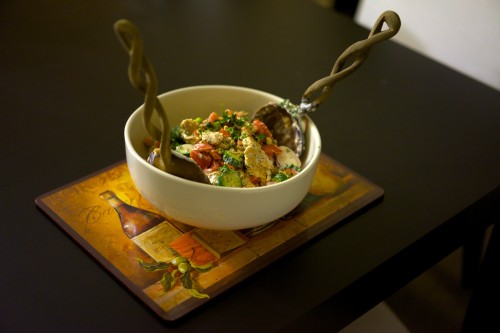
carrots with swiss chard, chicken peas, garlic, and herbs

carrots with swiss chard, chicken peas, garlic, and herbs

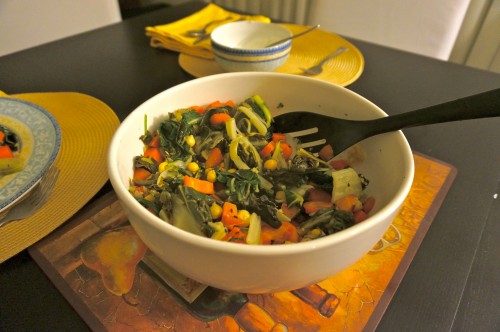
Look at this ginormous bowl of vegetables!

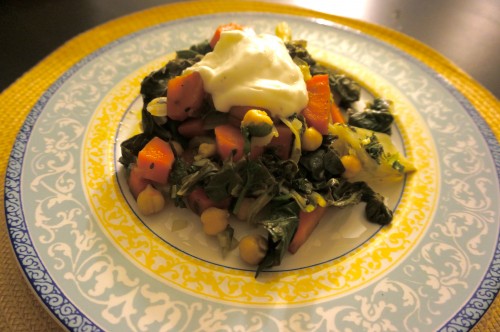
Chick pea saute

Chick pea saute

But  the finishing touch that really completes the dish is adding the Greek yogurt sauce on top. It just makes it so much tastier! And it adds a ton of calcium and protein – win-win :)

The greek yogurt on top really takes it up a notch!

The greek yogurt on top really takes it up a notch!


chick pea saute with greek yogurt

chick pea saute with greek yogurt

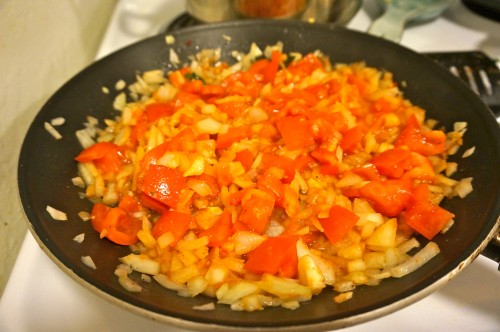
So to accompany the delicious and healthy chickpea saute we made some couscous with tomatoes and onions.  The first step is to dice and sautee an onion, then add sugar and tomato puree. Then dice two tomatoes (I added 3 because I love tomatoes!) and add them to the pan.

sauteed onions with tomatoes

sauteed onions with tomatoes

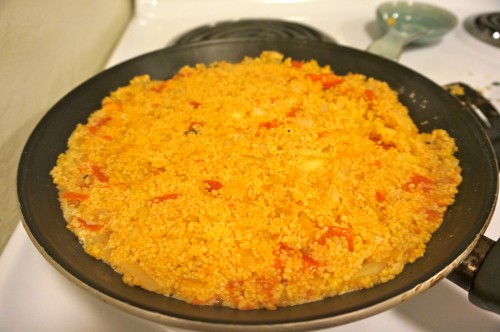
In the meanwhile, add boiling vegetable stock to some couscous and leave it to sit in a bowl covered in cling wrap for 10 minutes. Once the couscous is cooked, then you mix in the tomato and onion mixture and wipe off the pan and add some butter to it. The next part gets a little bit complicated…at least for a novice like me….making the couscous crispy was no easy task! You are supposed to add butter then put the couscous back in the pan and cover it and let it steam for 12 minutes. Well, I did this and it was not quite crispy. Probably I should have let it steam for longer but we were hungry so I decided to just go for it…What followed was an EPIC FAIL where I flipped the couscous onto a dish and some of it landed on the floor but luckily most of it made it to the dish! I think I need to buy bigger dishes….

cous cous with tomatoes and onions

cous cous with tomatoes and onions

Ottolenghi has an amazing way with making vegetarian dishes that are completely satisfying and don’t make you miss meat one bit. These dishes are healthy, relatively cheap and easy, and super flavorful and fulfilling. The only complicated step that I utterly failed at was getting the couscous crispy and then flipping it over “expertly” onto a dish –  so I did not manage to get that beautiful crispy crust that they claimed makes this dish. I still think it tasted amazing, but I think I will have to practice some more with the crisping and flipping..Here is my couscous with a corner of it looking crispy…it still tasted really good without the crispy crust but I will definitely need to practice with this one..
couscous with tomatoes and onion

couscous with tomatoes and onion

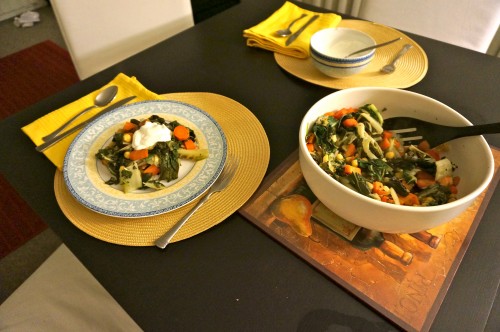
Here is my completed meal :) It was a totally satisfying, healthy, flavorful, and fulfilling vegetarian middle eastern inspired meal. Thanks Ottolenghi for two more great dishes :)

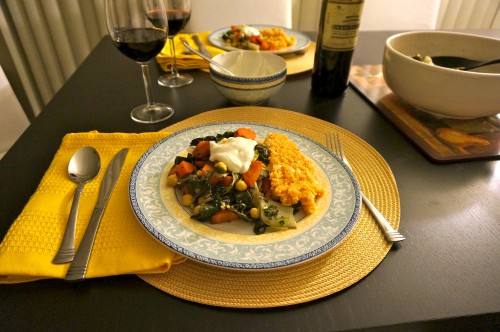
Bon apetit! Healthy vegetarian mediterranean inspired meal!

Bon apetit! Healthy vegetarian mediterranean inspired meal!

Barley risotto with marinated feta

So this past weekend I spent at a research conference in Bodega Bay.  This conference was for students conducting research at UC natural reserves, which is an incredible research network spanning many of the ecosystem types in California from the redwood tanoak forests of Big Sur where I work to the beaches where elephant seals spawn in Ano nuevo to the coniferous slopes of the eastern Sierras.  The conference was for students who won awards to do research on reserves and was a chance for us to share our research with each other.  Seeing everyone get so excited about their research gave me renewed enthusiasm about my own project studying the effects of Sudden Oak Death on fungi associated with the dying tanoaks in California. So while the meeting was really fun and I met some really interesting people, I was super tired when I finally made it back to Berkeley on Sunday. Luckily I had been planning on making this risotto last week but didn’t get around to it because I was busy preparing my talk for the conference, so I had all of the ingredients waiting for me in my kitchen!

So I invited over my friend Lauren who fortunately has lots of experience cooking with barley and  we made the barley risotto with marinated feta from pg 109 of Jerusalem and also featured online here.  If you are in the mood for a relatively low key but satisfying and unique vegetarian dish, this one is it! Compared to some of his other recipes, the ingredients are not that complicated and the cooking is not that difficult, other than the barley does take over an hour to cook (he says 45 minutes but I left mine simmering for at least an hour – the barley was still pretty chewy at 45 minutes!). Luckily Lauren and I had some episodes of Girls to catch up on, so we kept ourselves entertained watching the trials and tribulations of Hannah Horvath while our risotto simmered away.

I must say, this dish is really tasty.  The marinated feta in olive oil and with toasted caraway seeds and fresh oregano leaves really sets it off and takes it up a notch.  Ottolenghi is so good about adding those extra finishing touches that really make the dish!   I didn’t have celery stalks on hand but I did have some leftover celeriac from when I made the parsnip dumpling soup, and I added that to the risotto and it tasted delicious! The shallots, garlic, celeriac smelled so good while they sauteed in olive oil and butter. The addition of fresh herbs and fresh lemon peel make this dish flavorful and refreshing! Unlike traditional risotto, which while delicious is creamy and heavy and makes you feel a bit guilty while eating it, this risotto feels fresh and healthy. I highly recommend you try it!

Ingredients:

  • 1 cup pearl barley
  • 2 tbsp unsalted butter
  • 6 tbsp olive oil (this seemed excessive to be so I used 4 but under your discretion)
  • 2 small celery stalks (I didn’t have celery so used celeriac instead and it tasted great!)
  • 2 small shallots
  • 4 cloves garlic
  • 4 thyme sprigs
  • 1/2 tsp smoked paprika (I used regular paprika)
  • 4 strips lemon peel (I just peeled some off with a vegetable peeler)
  • 1 bay leaf
  • one 14 z can chopped tomatoes
  • 3 cups vegetable stock (I ended up using quite a bit more than this as I added more vegetable stock at the end when the risotto wasn’t cooked after 45 minutes)
  • 1.25 cups passata (sieved crushed tomatoes – I wasn’t sure where to find this so I used canned crush tomatoes)
  • 1 tbsp caraway seeds
  • 10.5 oz feta cheese (this is A LOT of feta, I think I used more like 8 oz)
  • 1 tbsp fresh oregano leaves
  • salt

Instructions: So the first step is to rinse the pearl barley well under cold water and leave it to drain.  Then melt the butter and 2 tbsp olive oil in a large pan (I didn’t use a large enough pan at first – make sure it’s big!!), then dice up the celery, shallots and garlic and cook them under gentle heat until soft.  Add all the rest of the ingredients save the feta, caraway seeds, oregano, and olive oil and stir to combine. Bring to boil, the reduce to gentle simmer and cook for 45 minutes to an hour (the barley takes a really long time to get less chewy).  To prepare the topping, toast the caraway seeds in a dry pan. Crumble the feta in a separate bowl, add 2-4 tbsp olive oil, marinate it, and add the seeds.  Spoon that along with some fresh oregano leaves on top of the risotto – don’t forget them because they really make the risotto extra special!


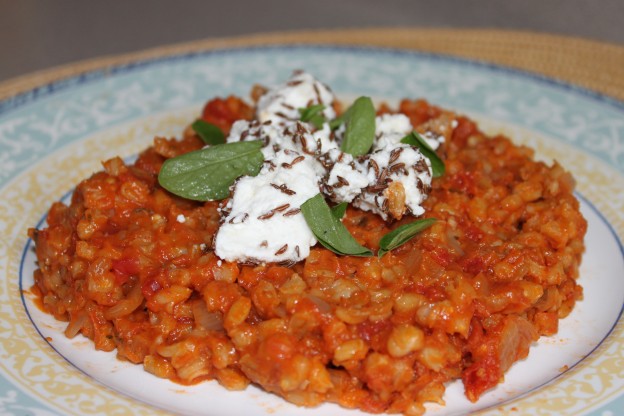
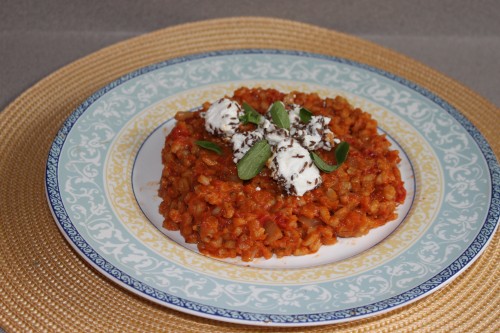
Barley risotto with marinated feta

Barley risotto with marinated feta

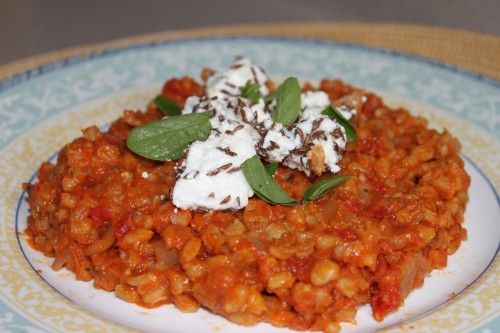
Barley risotto with marinated feta and fresh oregano

Barley risotto with marinated feta and fresh oregano


Parsnip dumplings in broth

This was one of the first recipes that I marked as one I wanted to try when I first bought Yotam Ottolengi’s cookbook Plenty.  Soups are known for being cheap, easy, and healthy, and also a good way to use up wilty looking vegetables. I’ve been wanting to get into making soup for a long time!  The problem with this soup is that you have to make the vegetable broth from scratch, which requires 1.5 hrs of simmering on the stove, so it seems like a good thing to get started on midday.  So making soup seems like a perfect sunday afternoon activity! You pretty much have to make the broth and dumpling batter in advance, and then you are ready to go to make the soup 5-10 minutes before you want to eat it.

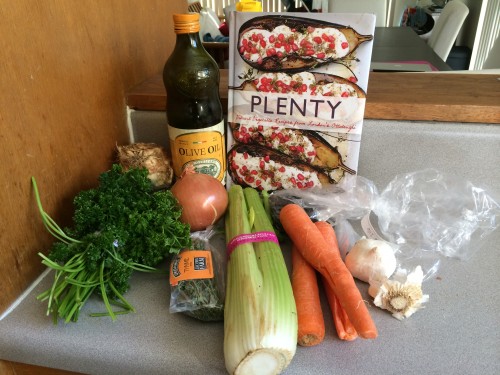
Ingredients for vegetarian Parsnip dumpling soup

Ingredients for vegetarian Parsnip dumpling soup

I went grocery shopping in preparation for this last night, and decided to make this broth after going to brunch this morning.  The online recipe appears here but since it looks pretty different than the one from the book here are the ingredients listed in the book:

Ingredients for the broth: 3 tbsp olive oil, 3 carrots, peeled and cut into sticks, 5 celery stalks, cut into chunks, 1 large onion, quartered, 1/2 celeriac, 7 garlic cloves, peeled, 5 thyme sprigs, 2 small bunches of parsley, 10 black peppercorns, 3 bay leaves, and 8 prunes.

Ingredients for the dumplings: 1/2 lb russet potato, peeled and diced, 1.5 cups peeled and diced parsnips, 1 garlic clove, peeled, 2 tbsp butter, 1/2 cup self rising flour (to make self rising flour, combine 1 cup flour, 1.25 tsp baking powder and a pinch of salt), 1/3 cup semolina, 1 egg, salt and pepper.

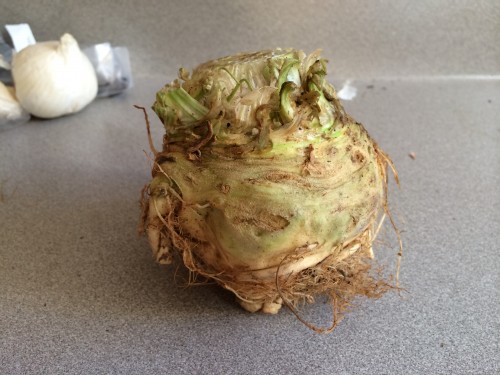
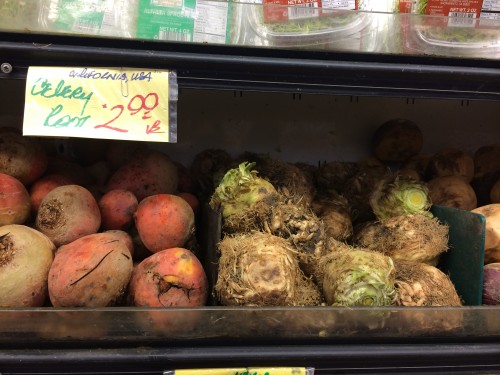
I had never heard of a celeriac before, so I looked it up on wikipedia.  Apparently it a variety of celery with a bloated root, and looks something like this:

Celeriac, a variety of celery with a bulbous hypocotyl.

Celeriac, a variety of celery with a bulbous hypocotyl.

Thankfully Berkeley bowl has strange things like this, and hopefully your grocery store does too!

Celeriac sold at Berkeley bowl for $2.99/lb!

Celeriac sold at Berkeley bowl for $2.99/lb!

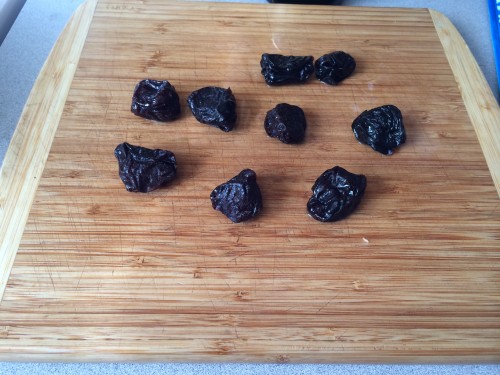
The spice aisle in the bulk foods section also came in handy for this recipe as I was able to buy just enough black peppercorns and bay leaves for the broth for 25 cents each, enough prunes for 80 cents, and semolina for the dumplings for 38 cents.

Here is what 80 cents of dried, pitted prunes looks like

Here is what 80 cents of dried, pitted prunes looks like

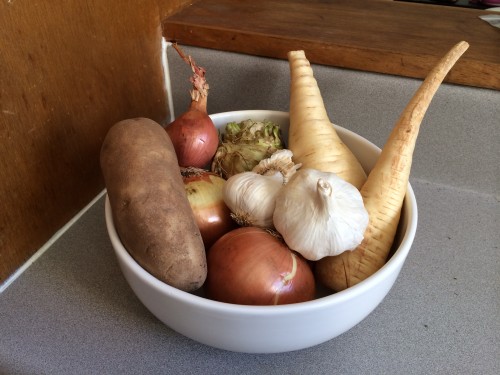
Ok so the prunes are not very beautiful, but all of the root vegetables for the soup were quite lovely.

Root vegetable bounty

Root vegetable bounty

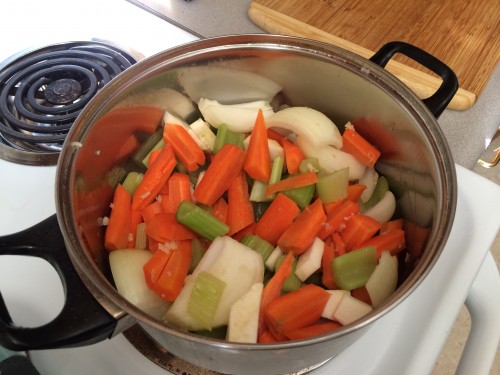
To make the broth, I heated up the olive oil in a pan and got to work cleaning and washing my vegetables.  I cut off the skin parts of the celeriac and diced it up and added it to the carrots, celery, and onion.

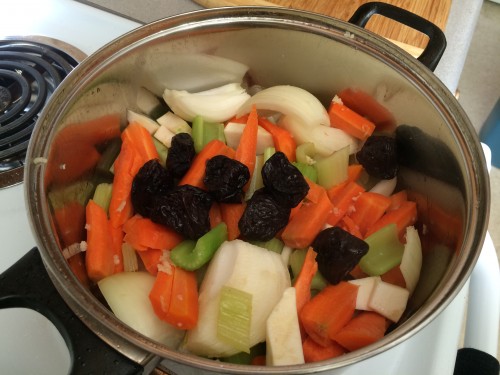
Chopped and peeled carrots, chopped celery, and quartered onions for the broth

Chopped and peeled carrots, chopped celery, and quartered onions for the broth

I didn’t want to bother peeling 7 garlic cloves so I just mashed them up in my garlic crusher – I figured that was okay. Let’s hope so! Here is the mirepoix (fancy french term for carrots, celery, onion) plus the celeriac and the prunes:

Mirepoix and prunes for soup broth

Mirepoix and prunes for soup broth

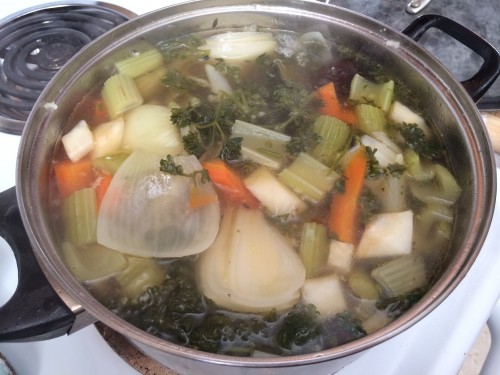
Luckily Berkeley bowl also had fresh thyme springs – I’m considering starting a little herb garden now with some mint and basil and thyme since I’ve been using so many fresh herbs in my cooking these days. I’ve heard they are easy and do not require too much of a green thumb! I grow lots of plants for my research but the plants we choose to grow for research are known for being easy and I have a greenhouse staff to help me out with pesky things like watering them :) I added the rest of the herbs, covered it in cold water, and then left it to simmer for 1.5 hours.

Ingredients for the vegetable broth simmering

Ingredients for the vegetable broth simmering

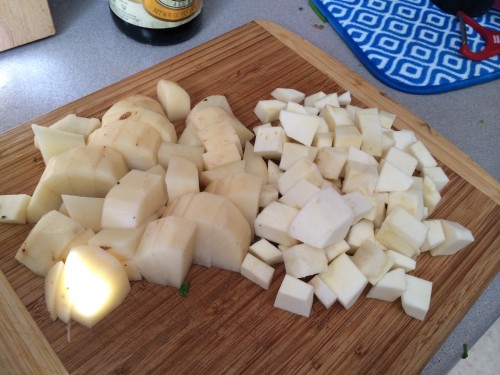
After I got the brother set up, I started on the dumplings. I diced the whole potato and parsnip as I figured exact measurements didn’t matter for this kind of recipe.

Diced potatoes and parsnips for the dumplings

Diced potatoes and parsnips for the dumplings

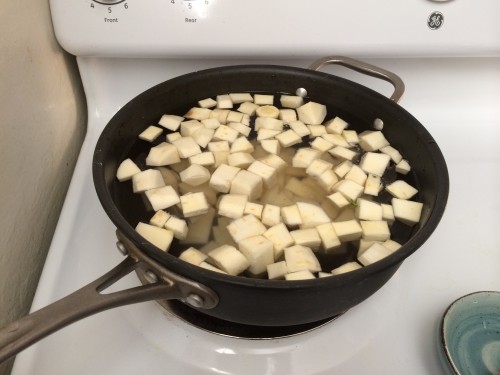
I diced and boiled them in water with a garlic clove and tested them out with a fork to see if they were soft.

Boiling parsnips and potatoes for the dumplings

Boiling parsnips and potatoes for the dumplings

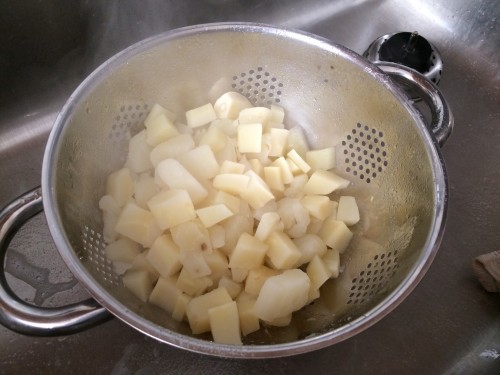
When soft enough, I drained them into a colander in the sink.

Boiled parsnips and potatoes for the dumplings

Boiled parsnips and potatoes for the dumplings

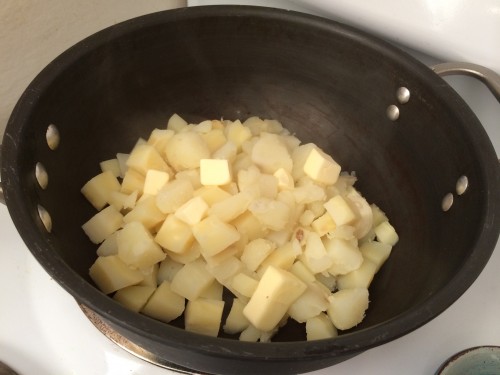
Then I quickly washed out the pan and put them back in the pan on the stove and added 2 tbsp butter. Yum!

Boiled parsnips and potatoes with 2 tbsp of butter

Boiled parsnips and potatoes with 2 tbsp of butter

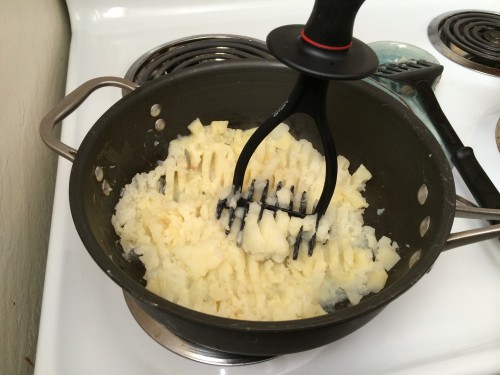
Next, I mashed the potatoes, garlic, turnips and butter. It smelled so good!

Mashing the potatoes, parsnips, and butter

Mashing the potatoes, parsnips, and butter

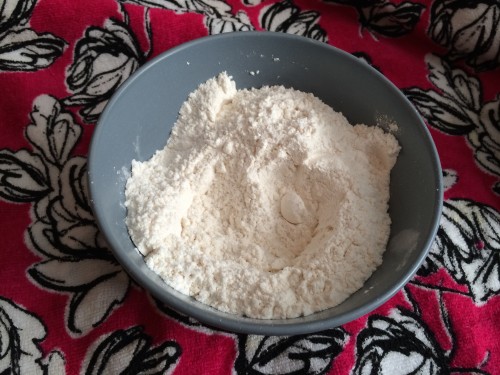
I quickly made some self-rising flour with 1 cup flour, 1.25 tsp baking powder, and a pinch of salt.

Self rising flour with baking powder and salt added to regular all purpose flour

Self rising flour with baking powder and salt added to regular all purpose flour

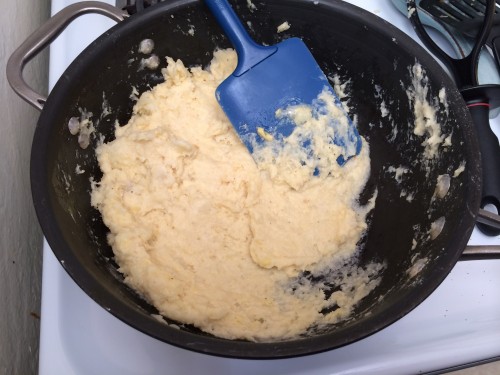
Then I added the flour, semolina, egg, salt and pepper to the mash and mixed it all well. It smelled so good!

Mashed potatoes, parsnips, butter, semolina, flour, egg, salt, and pepper for the dumplings

Mashed potatoes, parsnips, butter, semolina, flour, egg, salt, and pepper for the dumplings

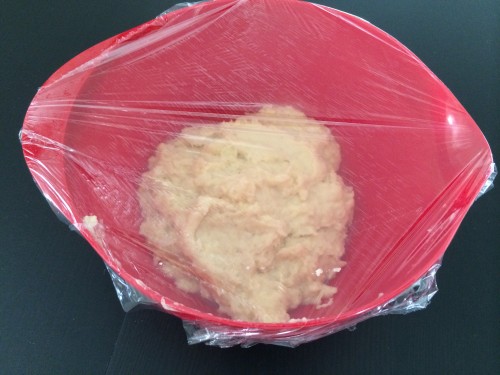
I transferred it to a plastic mixing bowl, covered it in plastic wrap, and moved it to the fridge.

Dumpling batter

Dumpling batter

Dumpling batter ready to be chilled

Dumpling batter ready to be chilled

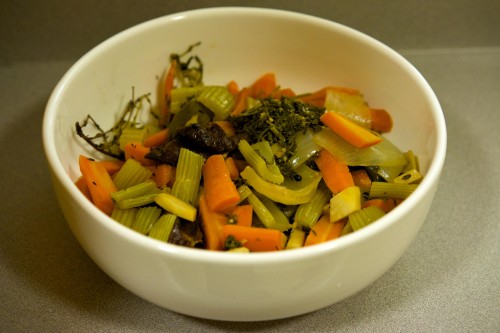
So there you go, make the broth and the dumpling batter far in advance, and then you are ready to go to make the soup fresh whenever you want. So admittedly, I’ve never made a vegetable broth from scratch before. What do you do with all of the vegetables after you strain the away from the broth? Here they are, don’t they look so pretty?

Vegetables strained out to make the broth

Vegetables strained out to make the broth

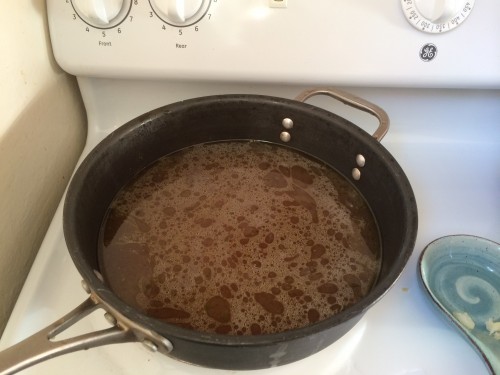
I asked my chef friend and she says she just throws them out. That seems sort of wasteful to me, so I decided to remove the thyme and bay leaves, add water, and blended them up with my handy immersion blender and make vegetable soup.  It looked pretty ugly so I will spare you the picture of it :P But here is the completed vegetable broth after I strained all of the vegetables out of it.

Vegetable broth

Vegetable broth

So when you are ready for the soup, reheat the broth and ring some salted water to a light simmer in a separate pan.  Dip a teaspoon into water and use it to spoon out the dumpling mix into the water.  Once the dumplings come to the surface, leave it to simmer for 30 seconds, remove from the water and place into broth.

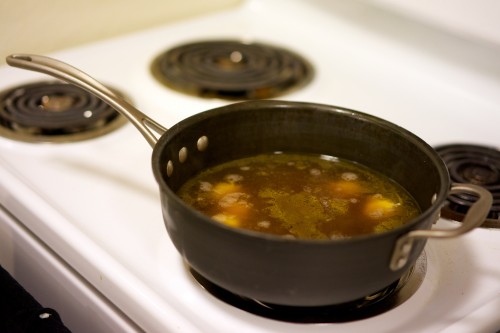
Dumplings simmering in broth

Dumplings simmering in broth

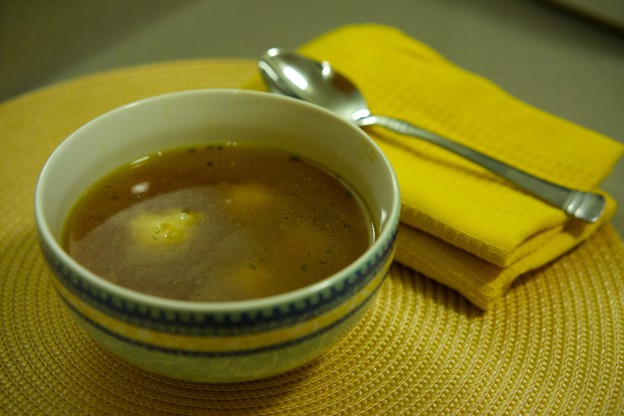
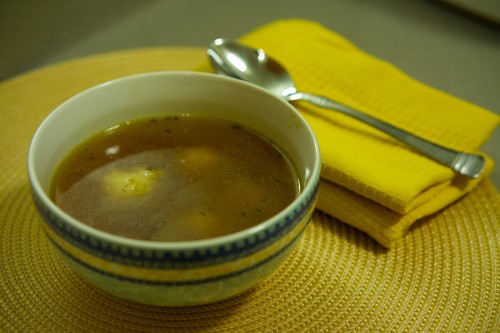
And here is the final product, parsnip dumpling soup!

Parsnip dumpling soup

Parsnip dumpling soup


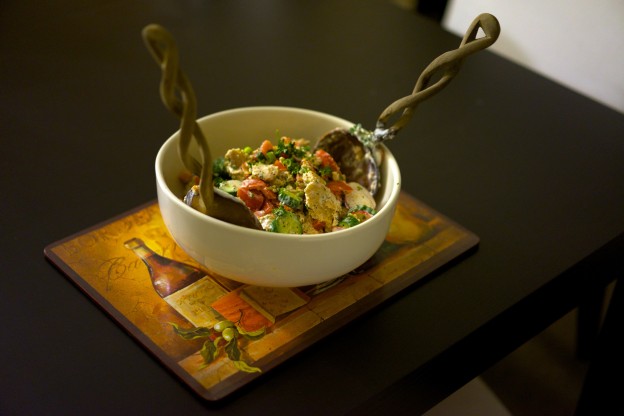
All about Fattoush

As you may have gathered from reading my previous posts, I just love this fattoush :) It’s so good! Even Oprah likes it – see the recipe printed here! It’s one of the first recipes in Yotam Ottolenghi and Sami Tamimi’s Jerusalem, and it just makes you feel so healthy and good about yourself eating it! I love all the herbs and fresh ingredients. Each time I’ve made it so far I’ve been switching back and forth between using buttermilk and mixing greek yogurt with milk for the dressing (you have the option of either using 1 and 2/3 cups buttermilk or 1 cup greek yogurt and 3/4 cup + 2 tbsp milk) and I’ve been trying out different pitas. I tried wheat pita today but I think white pita works the best.  I also decided to add more tomatoes and radishes this time since I usually have a lot of left over dressing at the bottom after I’ve finished the salad.
Fattoush

Fattoush

The first step is of course getting all the ingredients – you need 2 large naans/pitas/flat bread, the greek yogurt and milk or buttermilk, 3 large tomatoes, 100g radishes, 3 Lebanese cucumbers, 2 green onions, 15g fresh mint, 1 tbsp dried mint, 2 cloves garlic (definitely worth it to invest in a garlic crusher. So glad I bought one at walgreens!), 3 tbsp fresh squeezed lemon (I invested in a lemon squeezer because I’ve realized that yes, fresh squeezed lemon juice is way better), 1/4 cup olive oil, 2 tbsp white wine or cider vinegar, 1.5 tsp salt, pepper, and sumac to garnish if you have it.

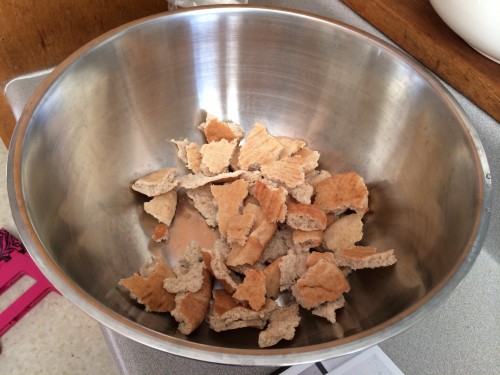
First, I tore up 2 large pitas and put them in this giant salad bowl that I just bought myself at Marshall’s (the best place to buy cheap good quality stuff! Hey, I’m still a grad student after all..)

torn up pita for base of fattoush

torn up pita for base of fattoush

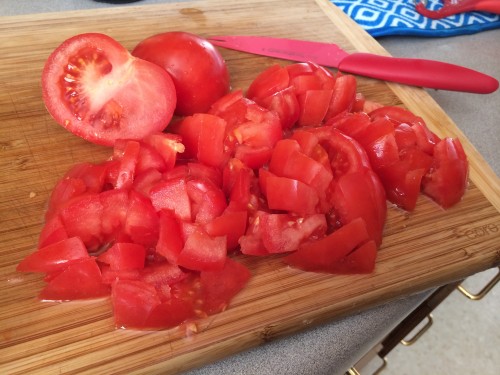
Next, I chopped up the tomatoes. I decided to go for 4 tomatoes this time since I just love tomatoes. How pretty are they?

Tomatoes

Tomatoes

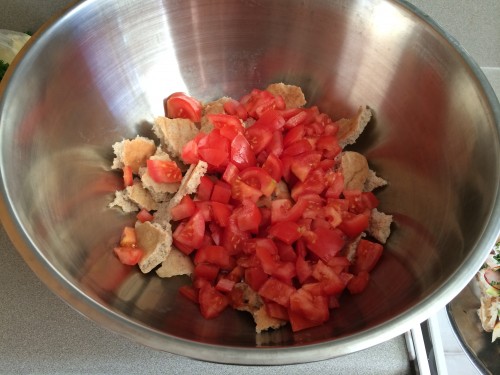
This is a pretty easy dish to make, you simply slowly add ingredients, layer by layer. Here is the pita with the tomatoes:

Fattoush and diced tomatoes

Pita and diced tomatoes

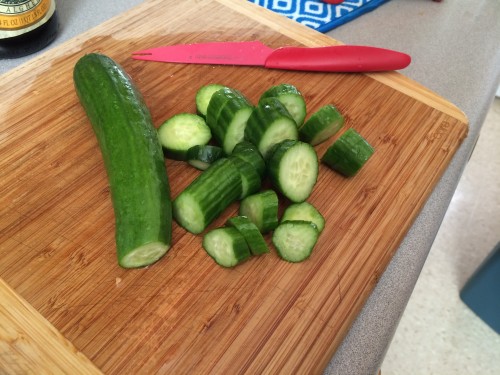
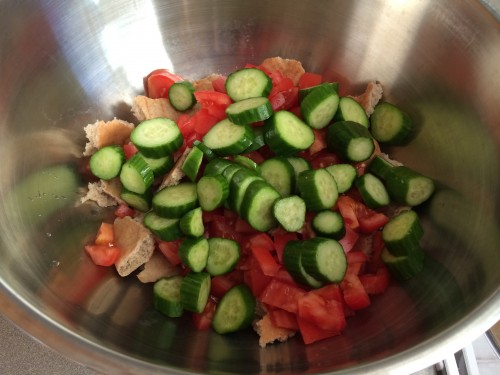
Next I chopped the Lebanese cucumbers (also called Persian cucumbers in stores, the small ones):

Lebanese cucumbers

Lebanese cucumbers

Then I added those to the tomatoes and pita:

Pita, tomatoes, cucumbers

Pita, tomatoes, cucumbers

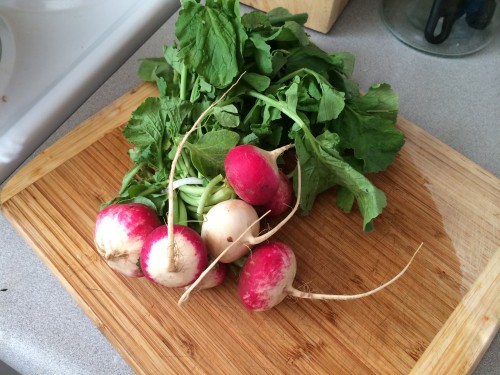
Next I added the radishes. I found some really pretty ones at the Berkeley bowl.

Radishes

Radishes

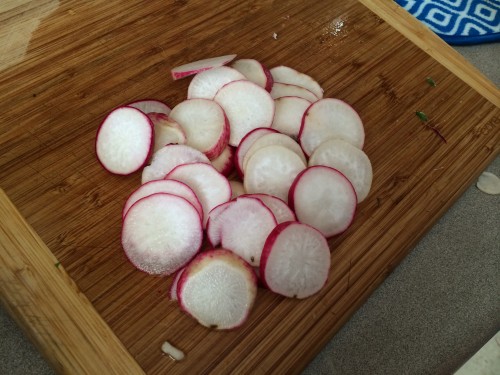
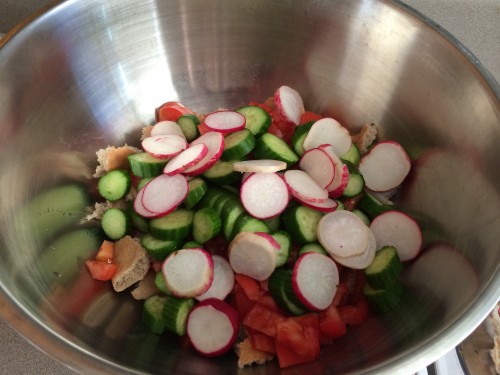
Then I sliced up the radishes and added them to the salad bowl:

Sliced radishes

Sliced radishes


Pita, tomatoes, cucumbers, radishes for fattoush

Pita, tomatoes, cucumbers, radishes for fattoush

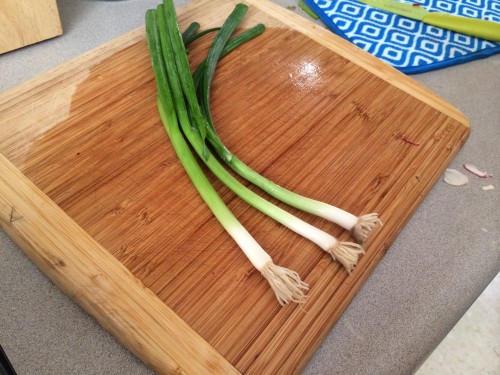
The next ingredient is green onions. There are varying opinions on how high to cut the onion up the green part. I usually cut off the roots and then go about half way up the green part.
green onions

green onions

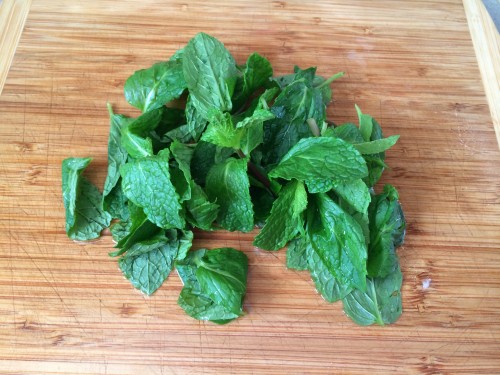
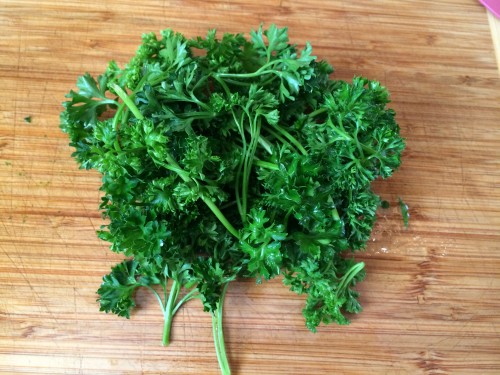
Next I got to add the fresh herbs, which I think are what really make this salad.

Fresh mint for fattoush

Fresh mint for fattoush

Fresh parsley for fattoush

Fresh parsley for fattoush

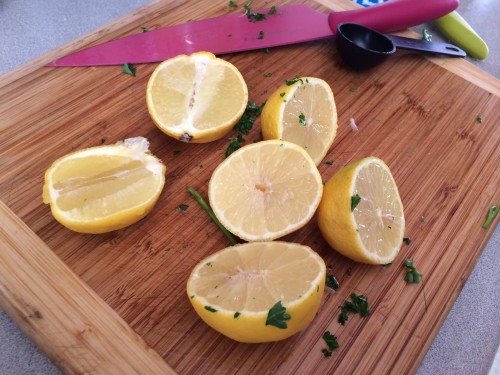
After the herbs, I added two crushed garlic cloves, which is admittedly pretty garlicky. Next time I might add just one. Follow your taste buds on this one! Then add 1 tbsp dried mint, 1/4 cup olive oil, 2 tbsp white wine/cider vinegar, 1.5 tsp salt, and some pepper. The recipe calls for 3 tbsp lemon juice, and I definitely recommend investing in a squeezer and making it fresh. I bought one recently and I’m very happy with my purchase :)
Lemons to be squeezed for the fattoush

Lemons to be squeezed for the fattoush

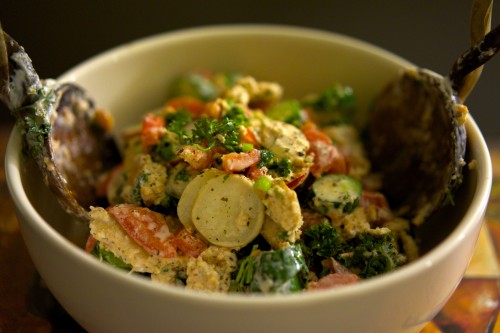
Next toss all the ingredients together and it’s best to let this dish sit for a while and let the flavors meld.

Fattoush

Fattoush

Fattoush

Fattoush


Ingredients

  • Scant 1 cup Greek yogurt plus 2 Tbsp. whole milk, or 1 cup buttermilk (replacing both yogurt and milk)
  • 2 large stale Turkish flatbread/pita (9 ounces in total)
  • 3 large tomatoes (13 ounces in total), cut into 1/2-inch dice
  • 3 ounces radishes, thinly sliced
  • 3 Lebanese or mini cucumbers (9 ounces in total), peeled and chopped into 1/2-inch dice
  • 2 green onions, thinly sliced
  • 1/2 ounce fresh mint
  • Scant 1 ounce flat-leaf parsley, coarsely chopped
  • 1 Tbsp. dried mint
  • 2 cloves garlic, crushed
  • 3 Tbsp. freshly squeezed lemon juice
  • 1/4 cup olive oil, plus extra to drizzle
  • 2 Tbsp. cider or white wine vinegar
  • 3/4 tsp. freshly ground black pepper
  • 1 tsp. salt
  • 1 Tbsp. sumac or more to taste, to garnish